Test This Solution
In the previous steps, we successfully deployed the aws_ci_bot solution to your AWS account. Now, we can use a dummy CodeCommit repository to test this solution. As part of the deployment, a CodeCommit repository called aws_ci_bot_test-project and a CodeBuild project with the same name were created. We will use these resources to test the solution.
Add necessary files to your CodeCommit repository
Currently, the aws_ci_bot_test-project repository is empty, so we need to add some files to it. Fortunately, you can do this via the AWS CodeCommit console without having to install any Git clients. In this document, we will be using the AWS CodeCommit console to add the necessary files. However, feel free to use your favorite Git client if you prefer.
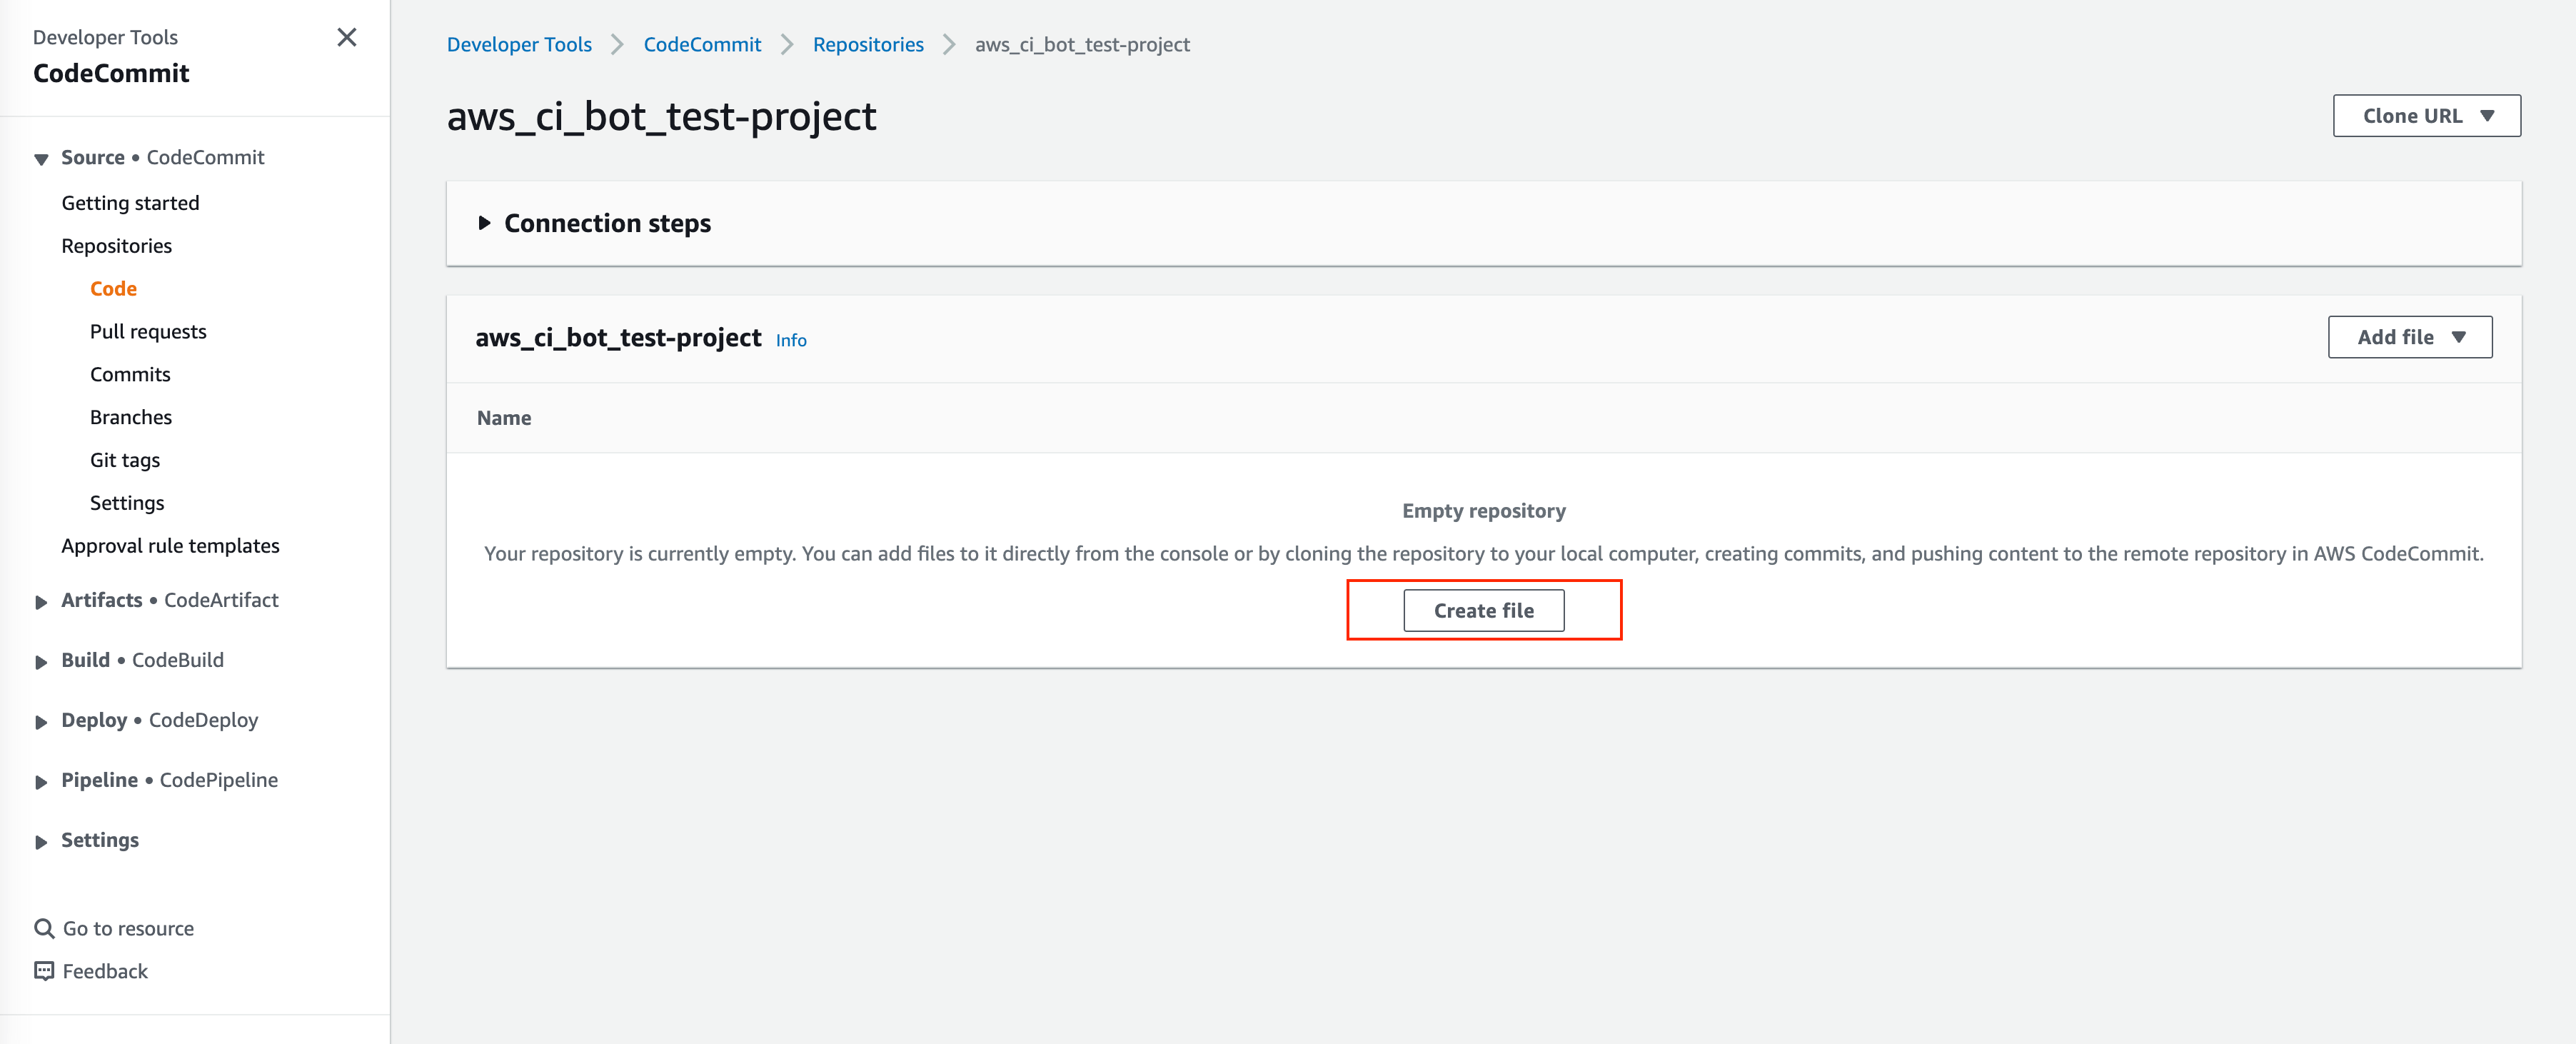
Find your repo in AWS CodeCommit Repositories Console.
- Add the
codebuild-config.jsonfile, so the CI-Bot knows that which CodeBuild project you want to use to run CI for this repo: You can click “Create File”.
Post the following JSON body and add the file, set “File name” as
codebuild-config.json, put your “Author name” and “Email address”, then click “Commit Changes”:
{
    "jobs": [
        {
            "project_name": "aws_ci_bot_test-project",
            "is_batch_job": false,
            "buildspec": "",
            "env_var": {}
        }
    ]
}

- Add the
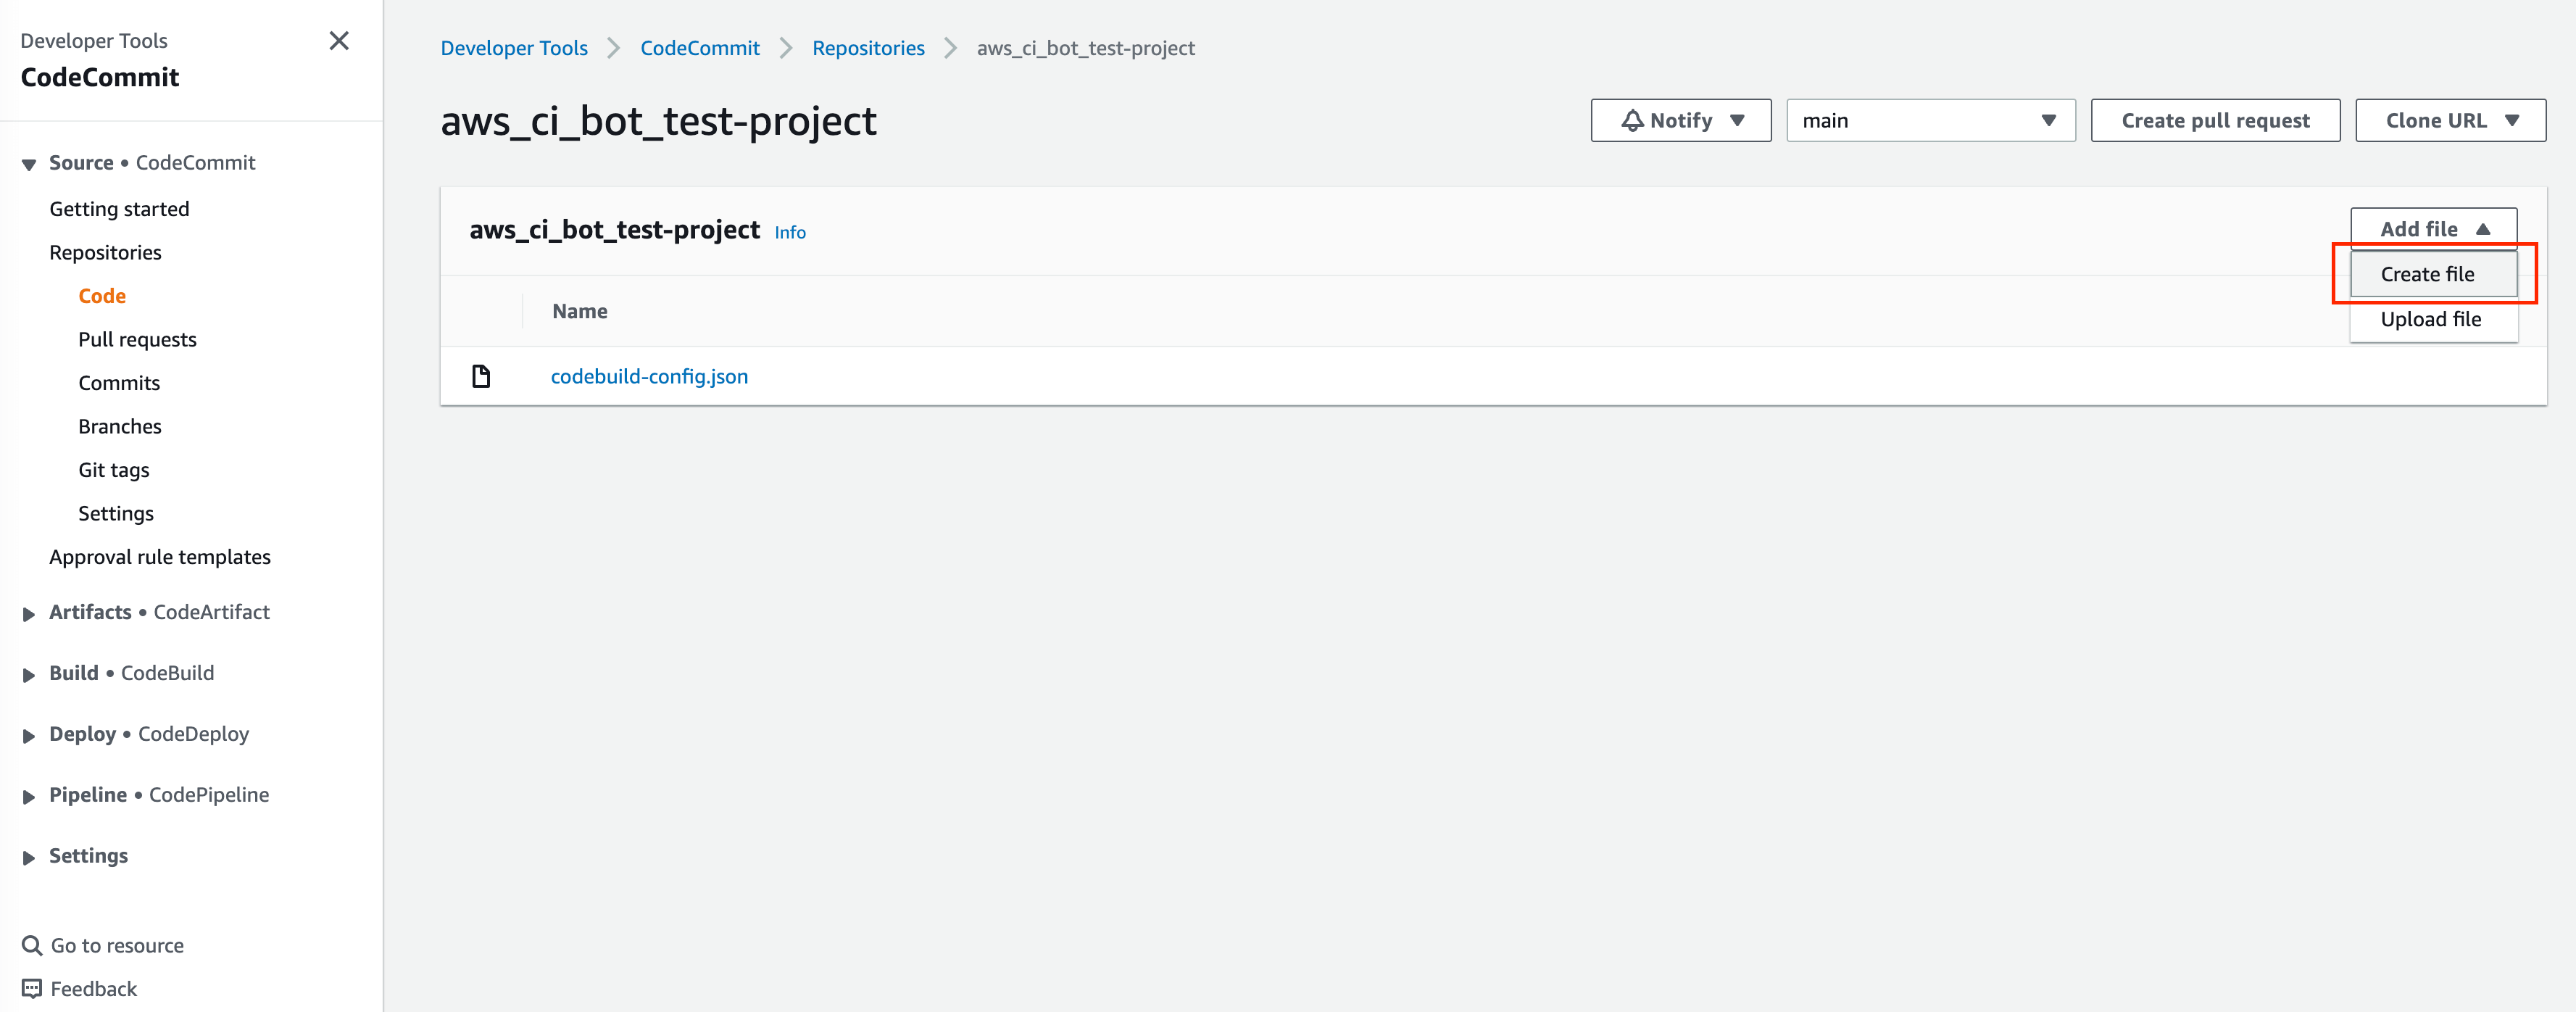
- Add the
buildspec.ymlfile, so the CodeBuild knows what to run in build job. In this example, it is just a dummy build job that runs a lot ofechocommands. You can click “Add File”, “Create File”.
Put the following content and add the file, set “File name” as
buildspec.yml, put your “Author name” and “Email address”, then click “Commit Changes”:
# Ref: https://docs.aws.amazon.com/codebuild/latest/userguide/build-spec-ref.html
version: 0.2

phases:
  install:
    runtime-versions:
      python: 3.8
    commands:
      - echo "install phase"
  pre_build:
    commands:
      - echo "pre_build phase"
  build:
    commands:
      - echo "build phase"
  post_build:
    commands:
      - echo "post_build phase"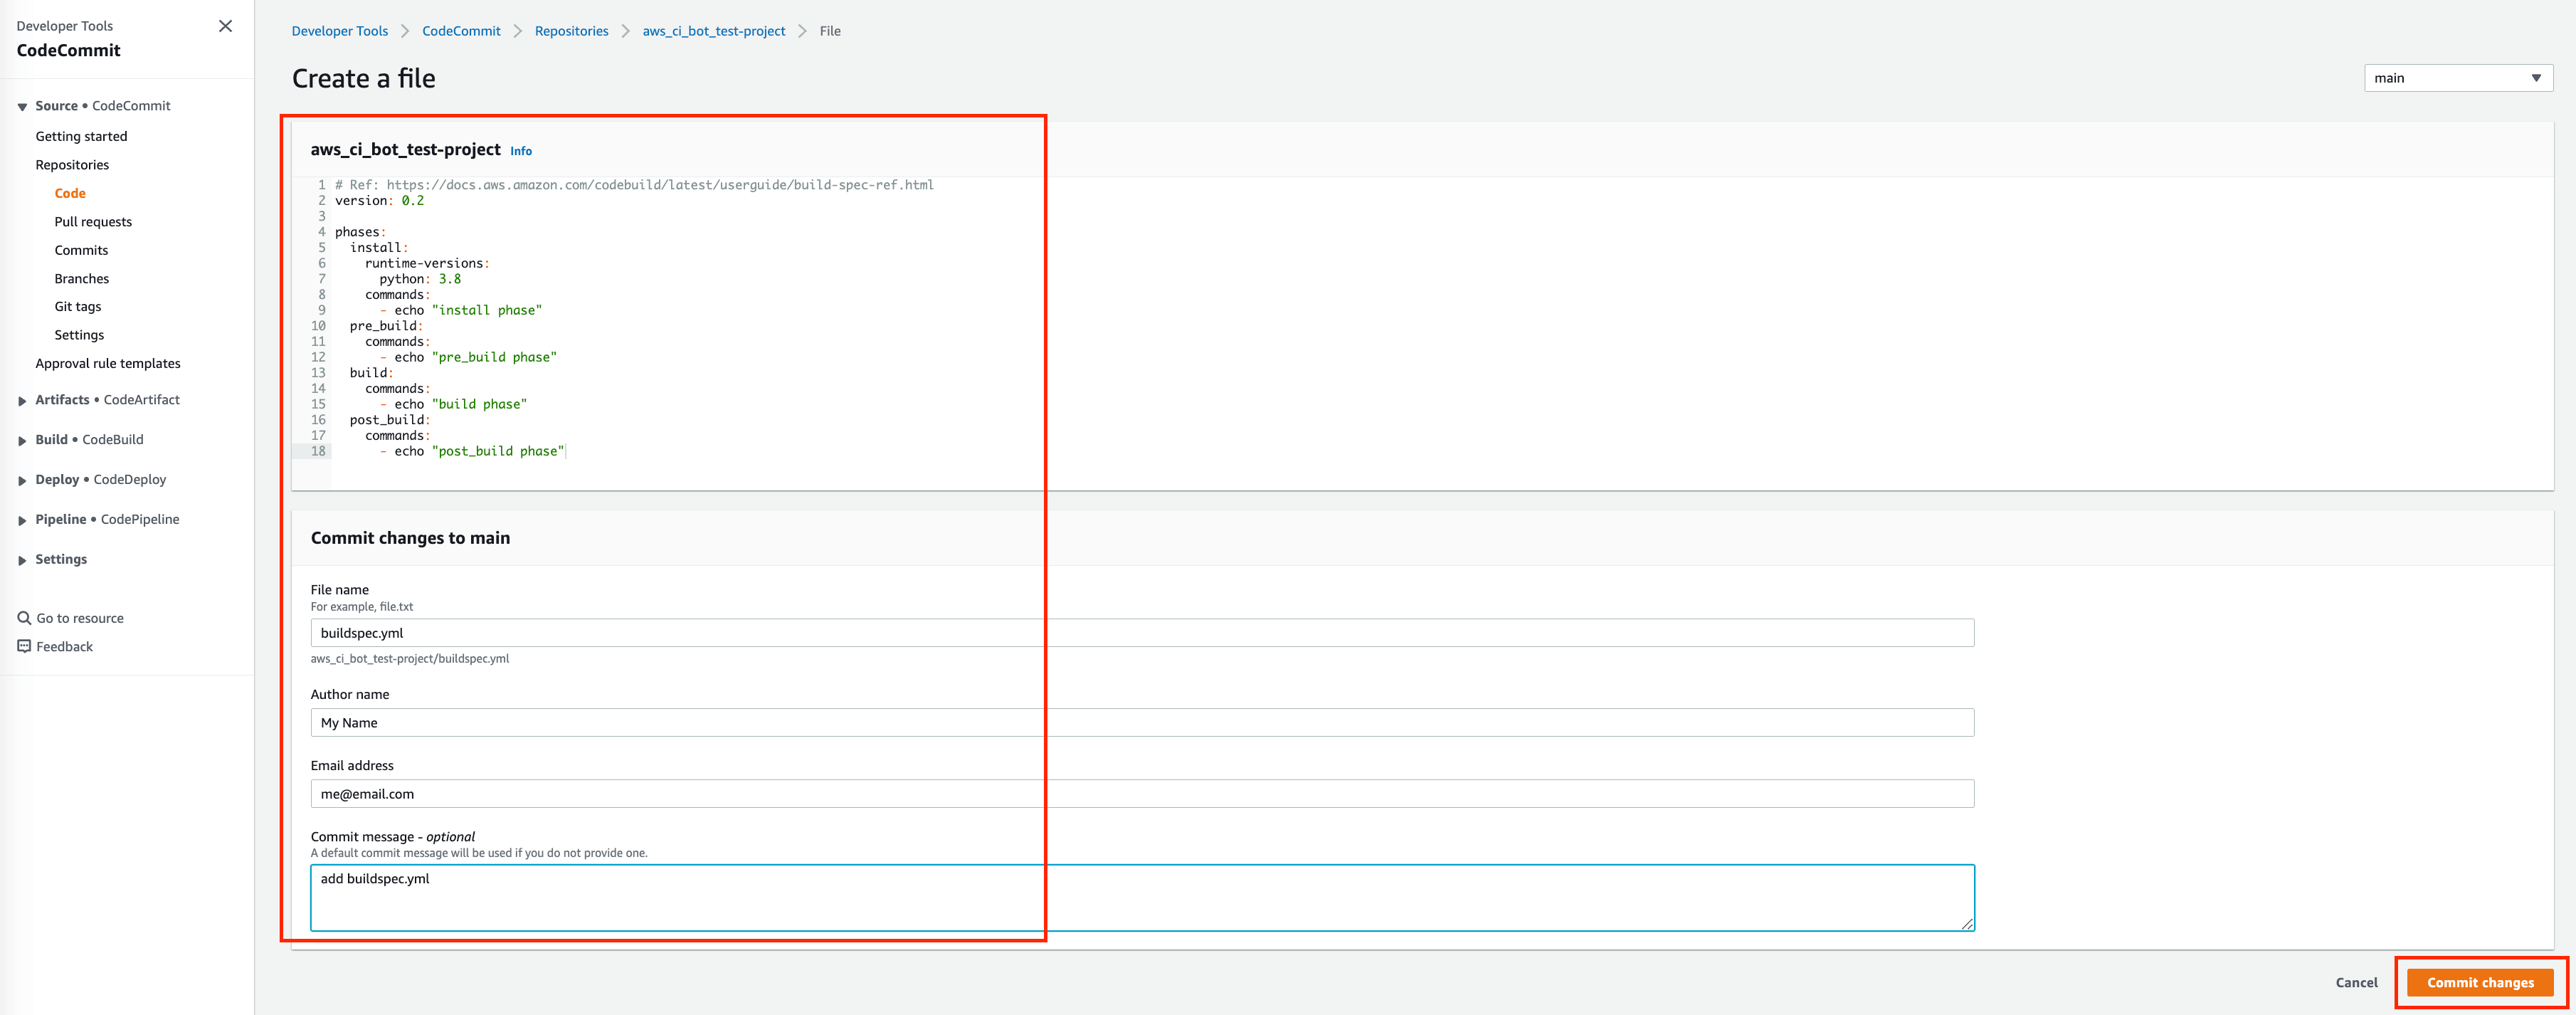
- Add the
Add a
chore.txtfile. Because this is an example repo, we can simulate that we are adding new features by updating the content of thechore.txtfile. You can click “Add File”, “Create File”, puthello worldto the content, set “File name” aschore.txt, put your “Author name” and “Email address”, then click “Commit Changes”
Now this repo is all set for testing. In production, this is also the step we should do before checking in any real application code.
Trigger a Build Job by Creating a Pull Request
In the CI Strategy Definition section, our CI strategy is:
We only build for ‘Pull Request create / update’ event, only if the source branch is the following pre-defined branch (please check the CI Strategy Definition for details), regardless of the target branch.
Now we want to simulate a scenario that a developer created a new branch, and started a Pull Request to merge to the main branch.
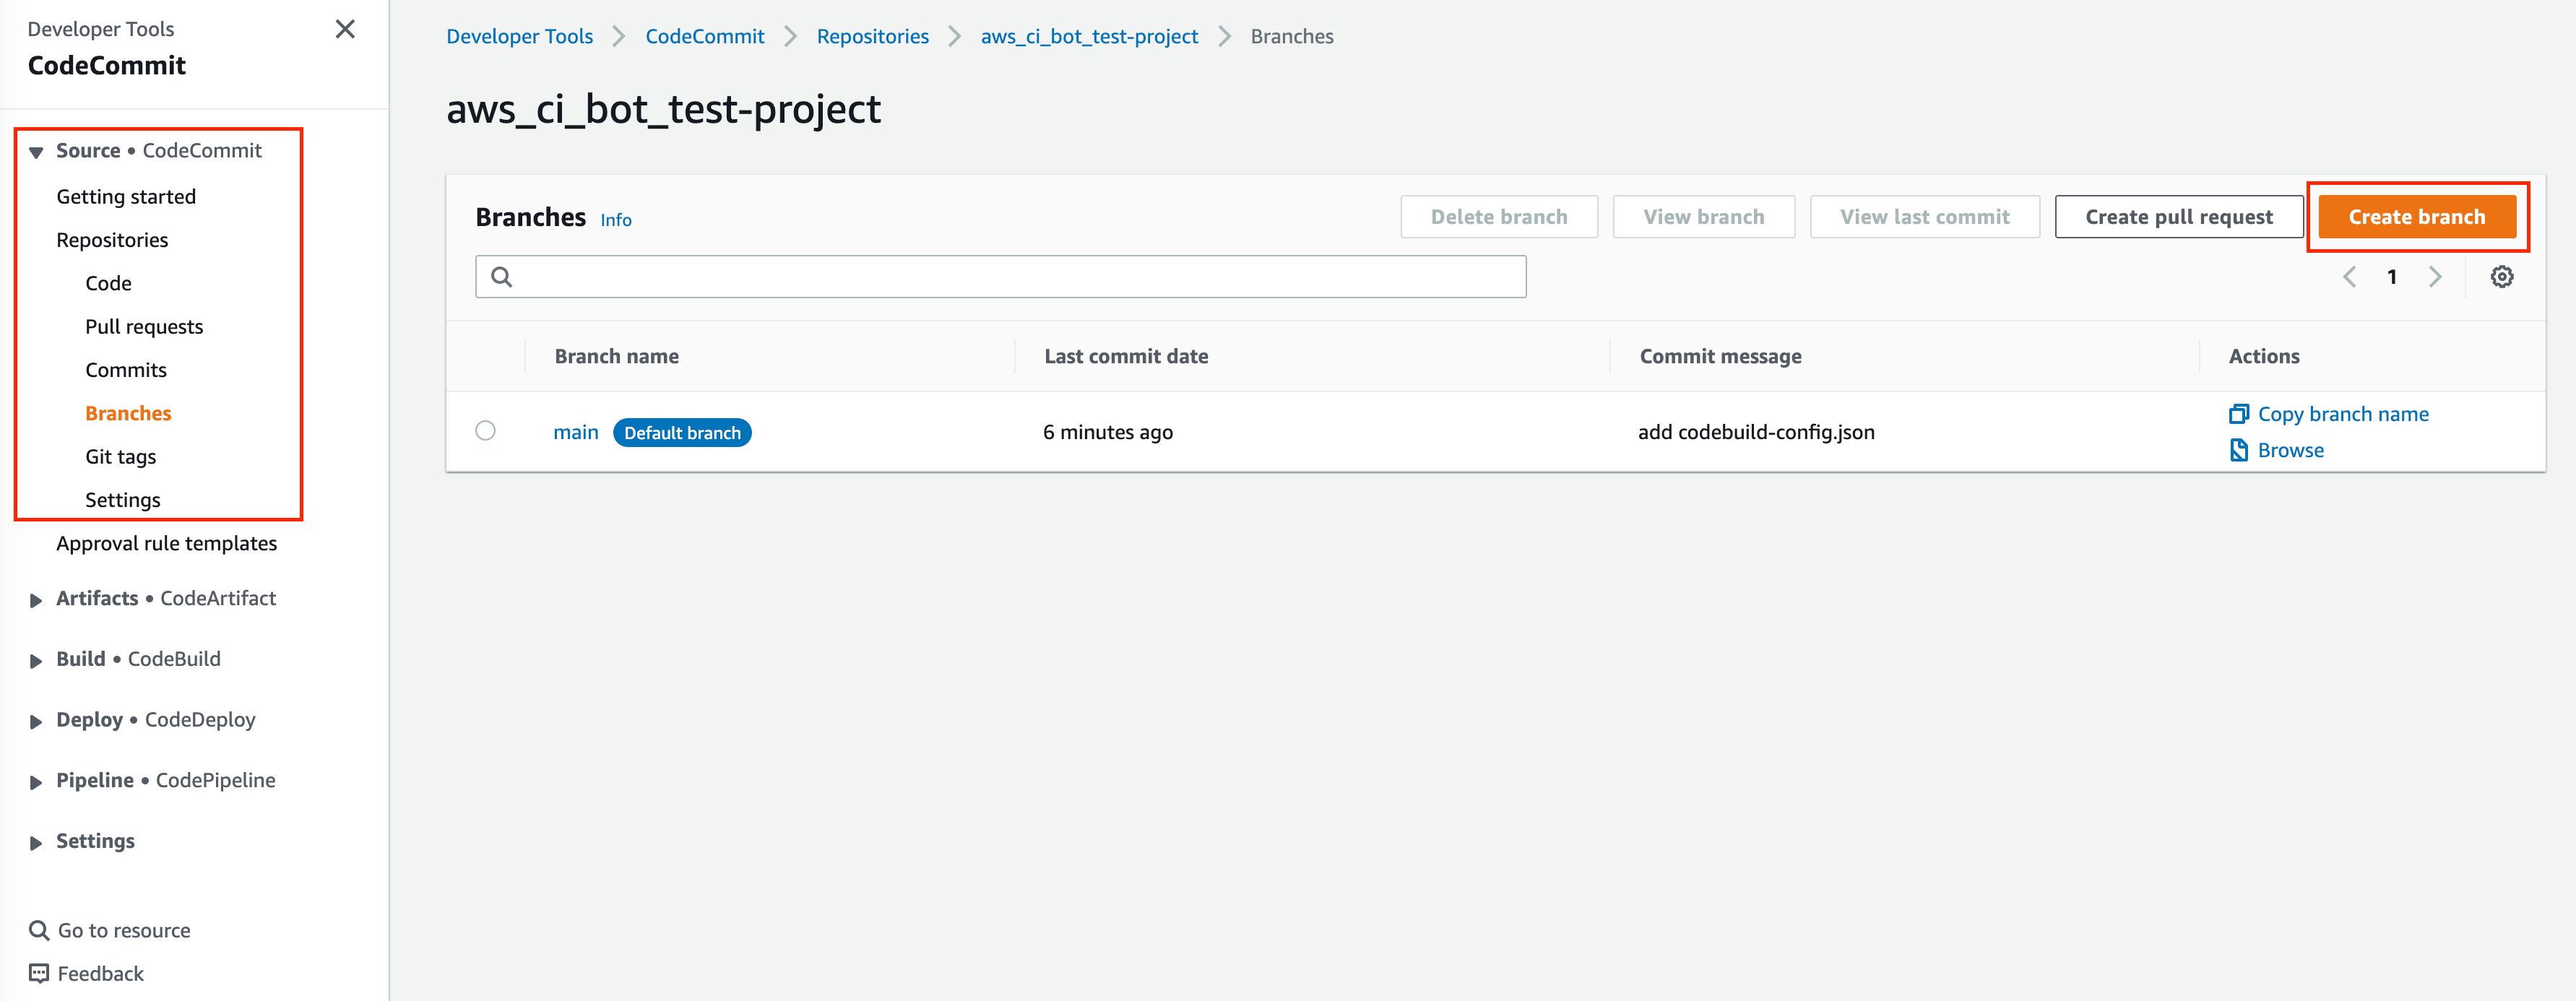
Find your repo in AWS CodeCommit Repositories Console, enter your repo, then click “Branches” on the side bar.
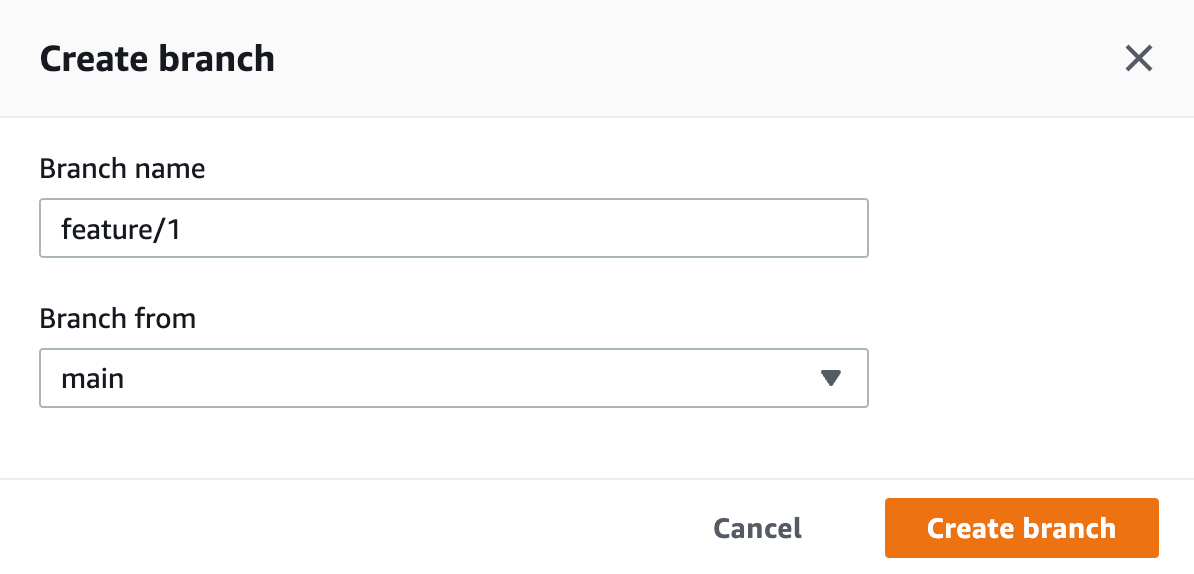
Click “Create branch” button and give it a name called
feature/1.
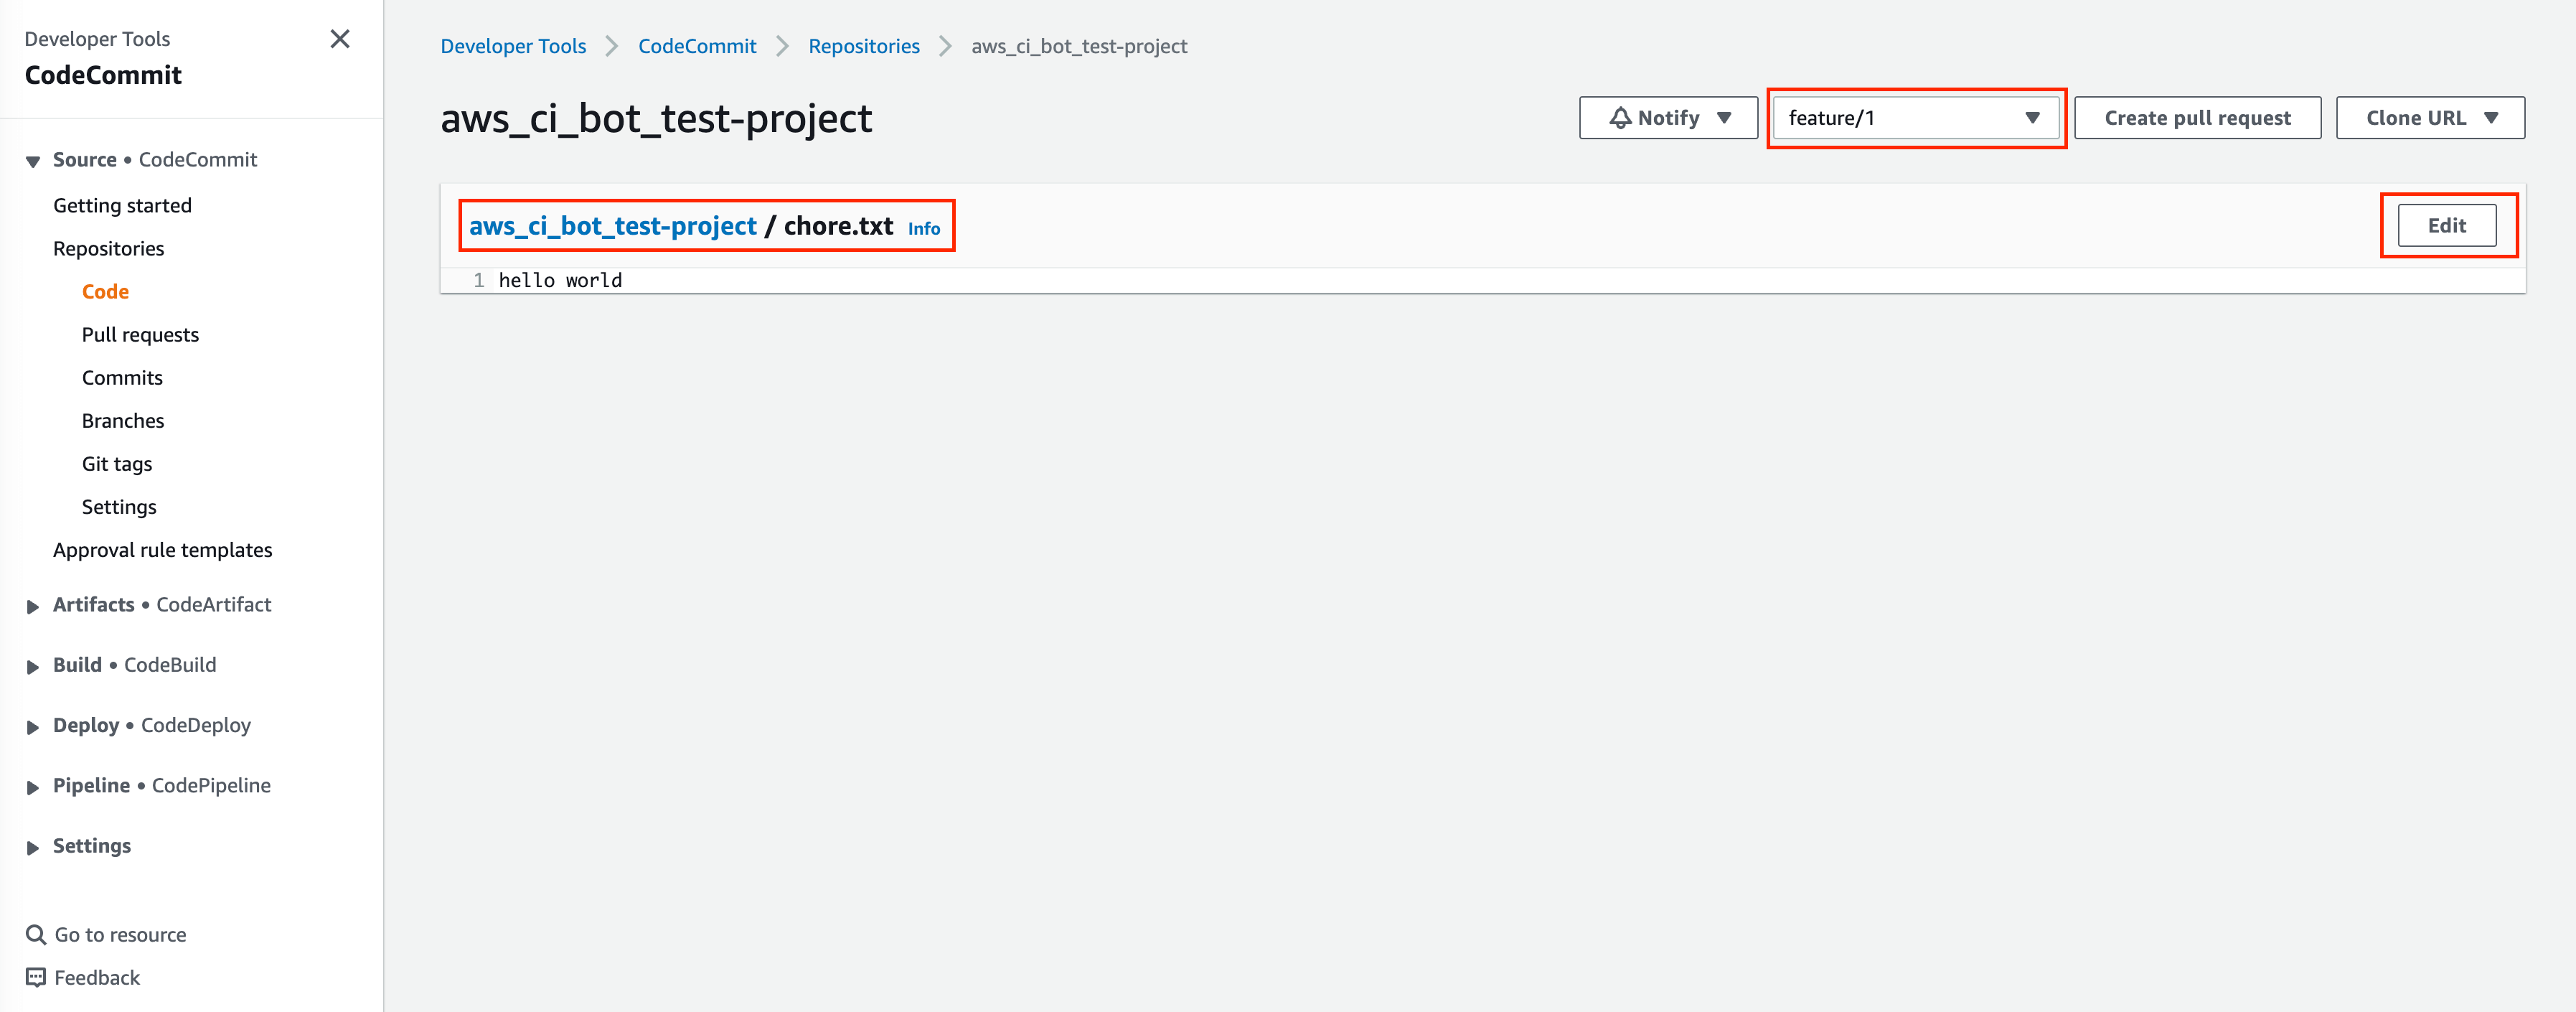
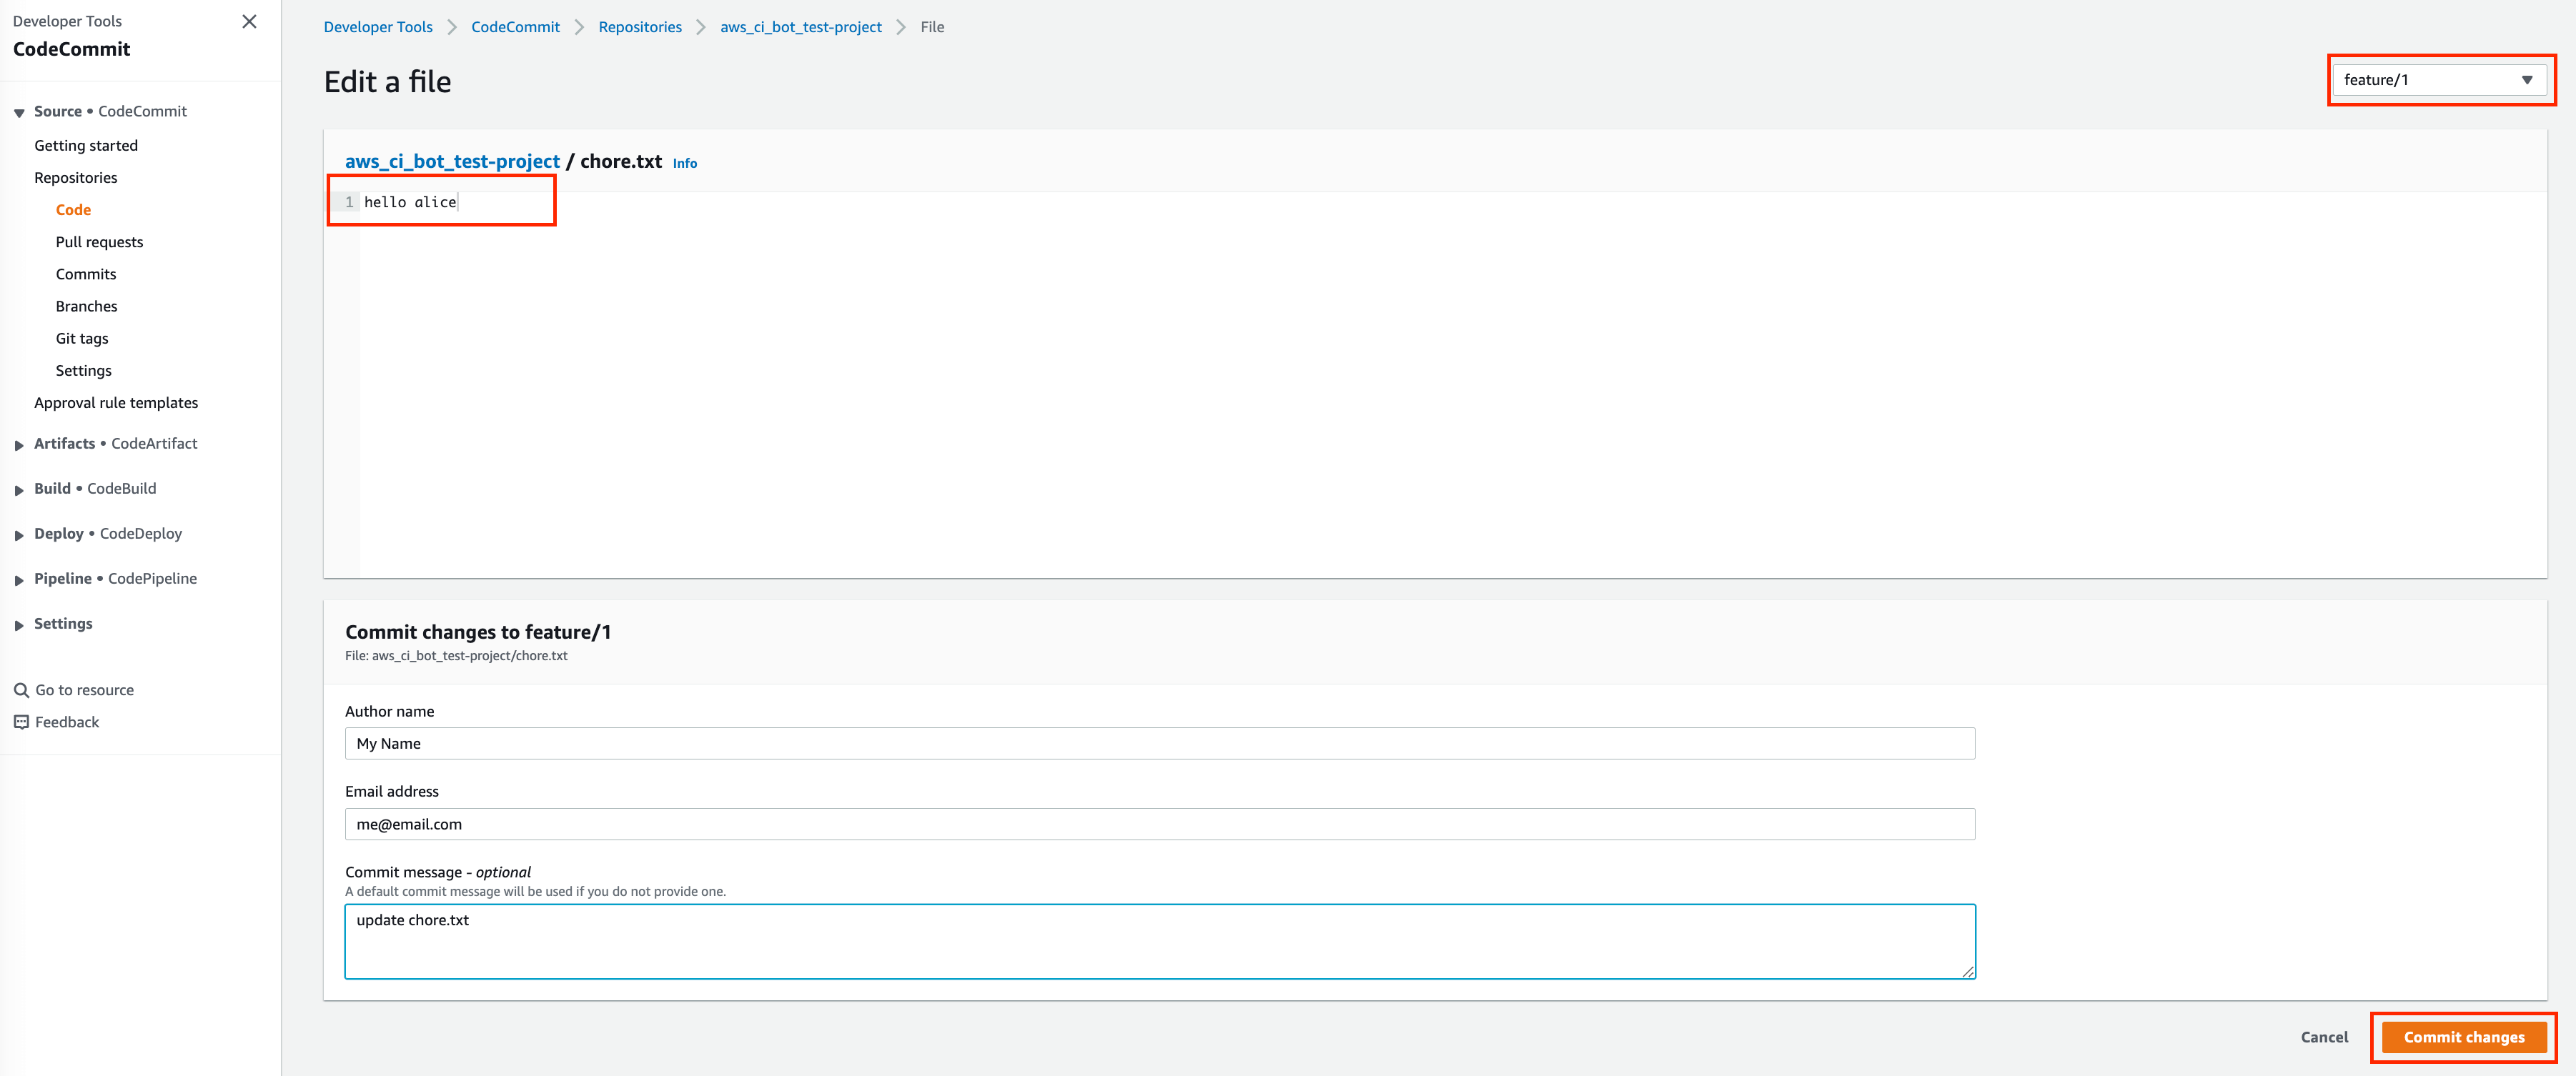
Switch to
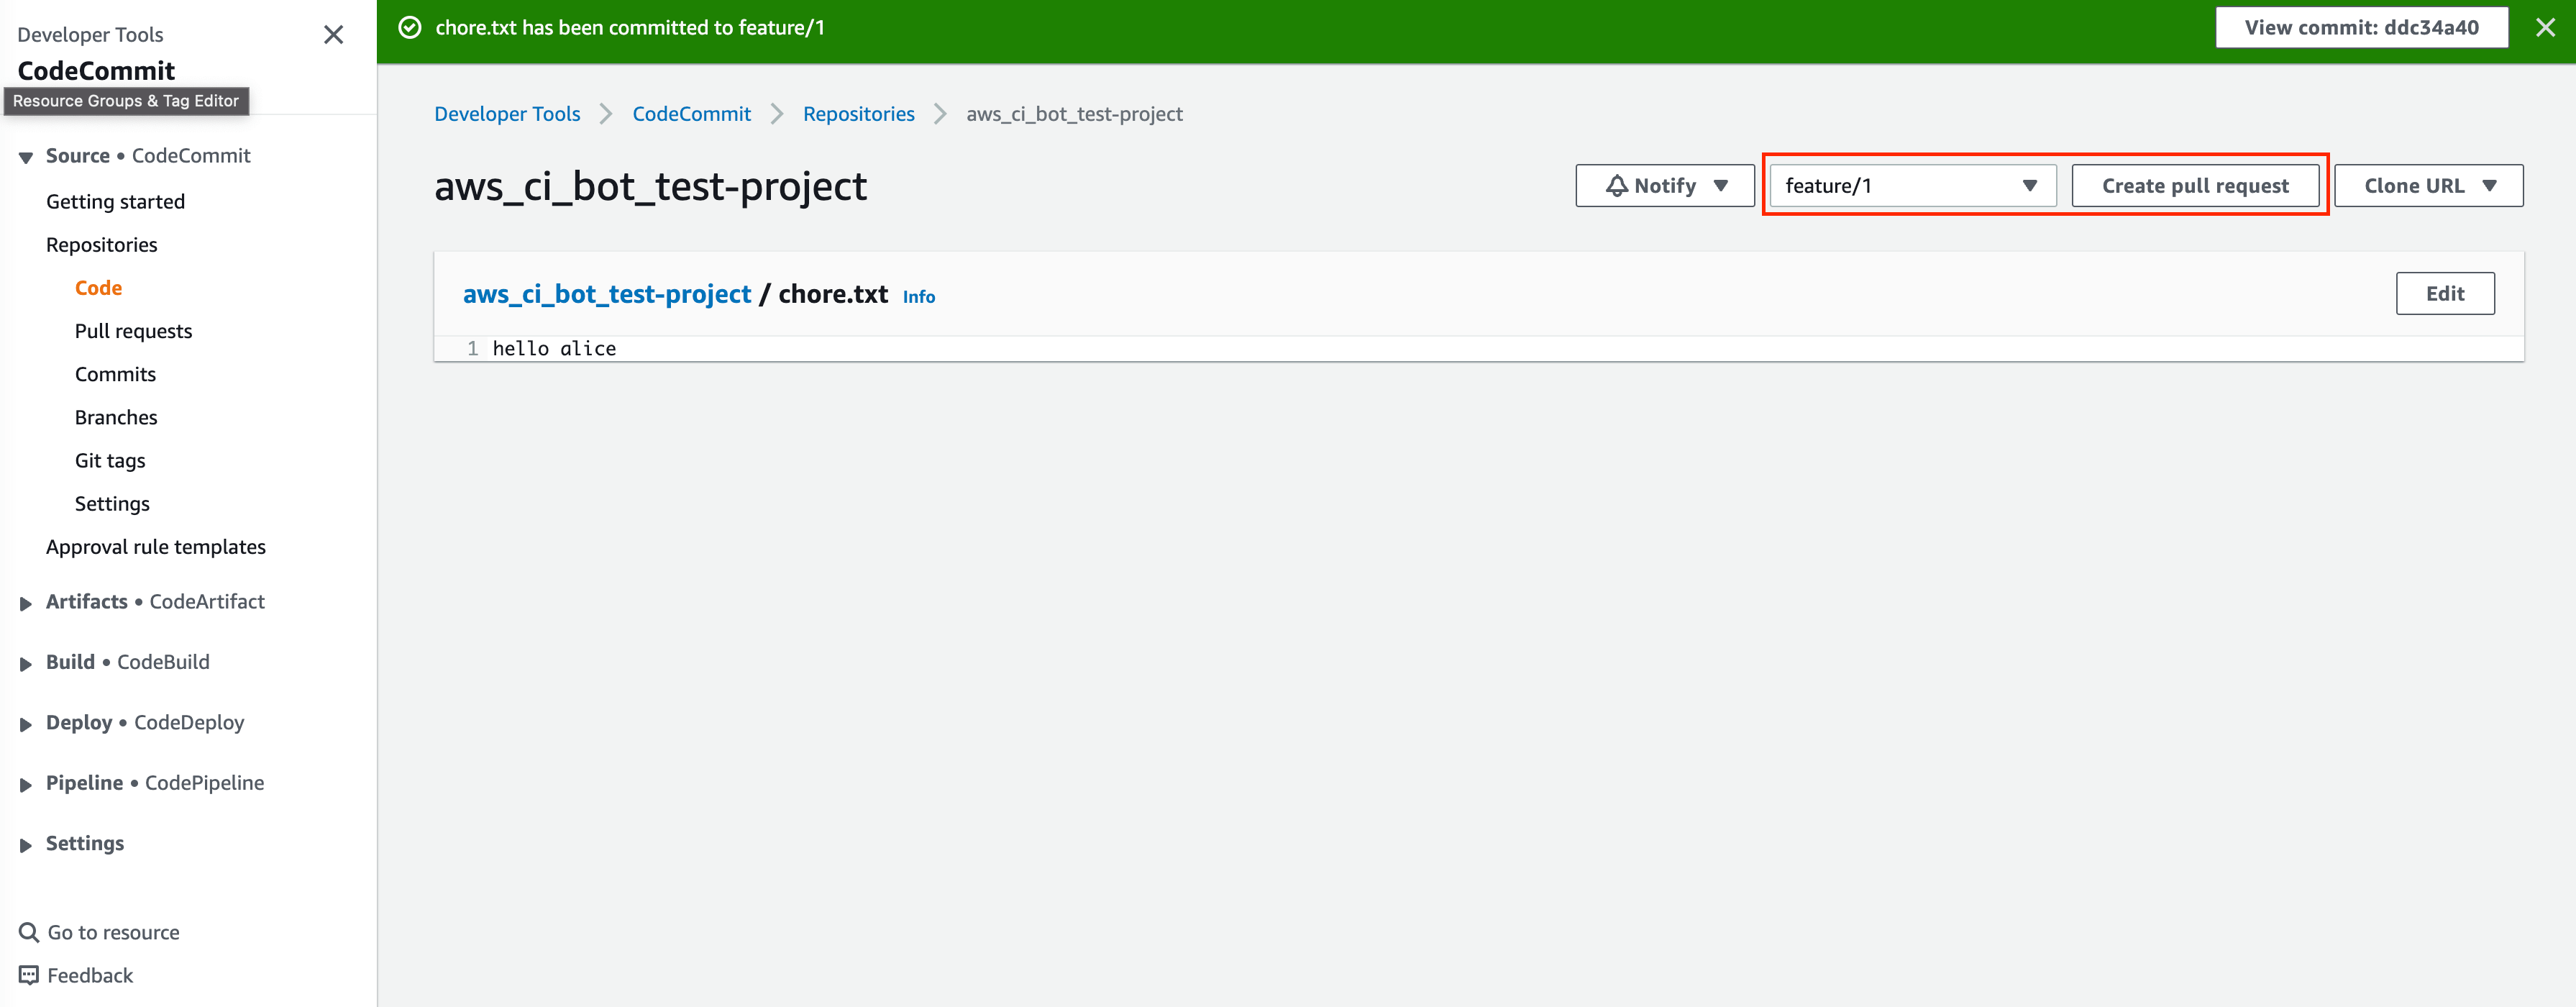
feature/1branch, and edit thechore.txtfile, enter random value to the content likehello alice, and commit the change.
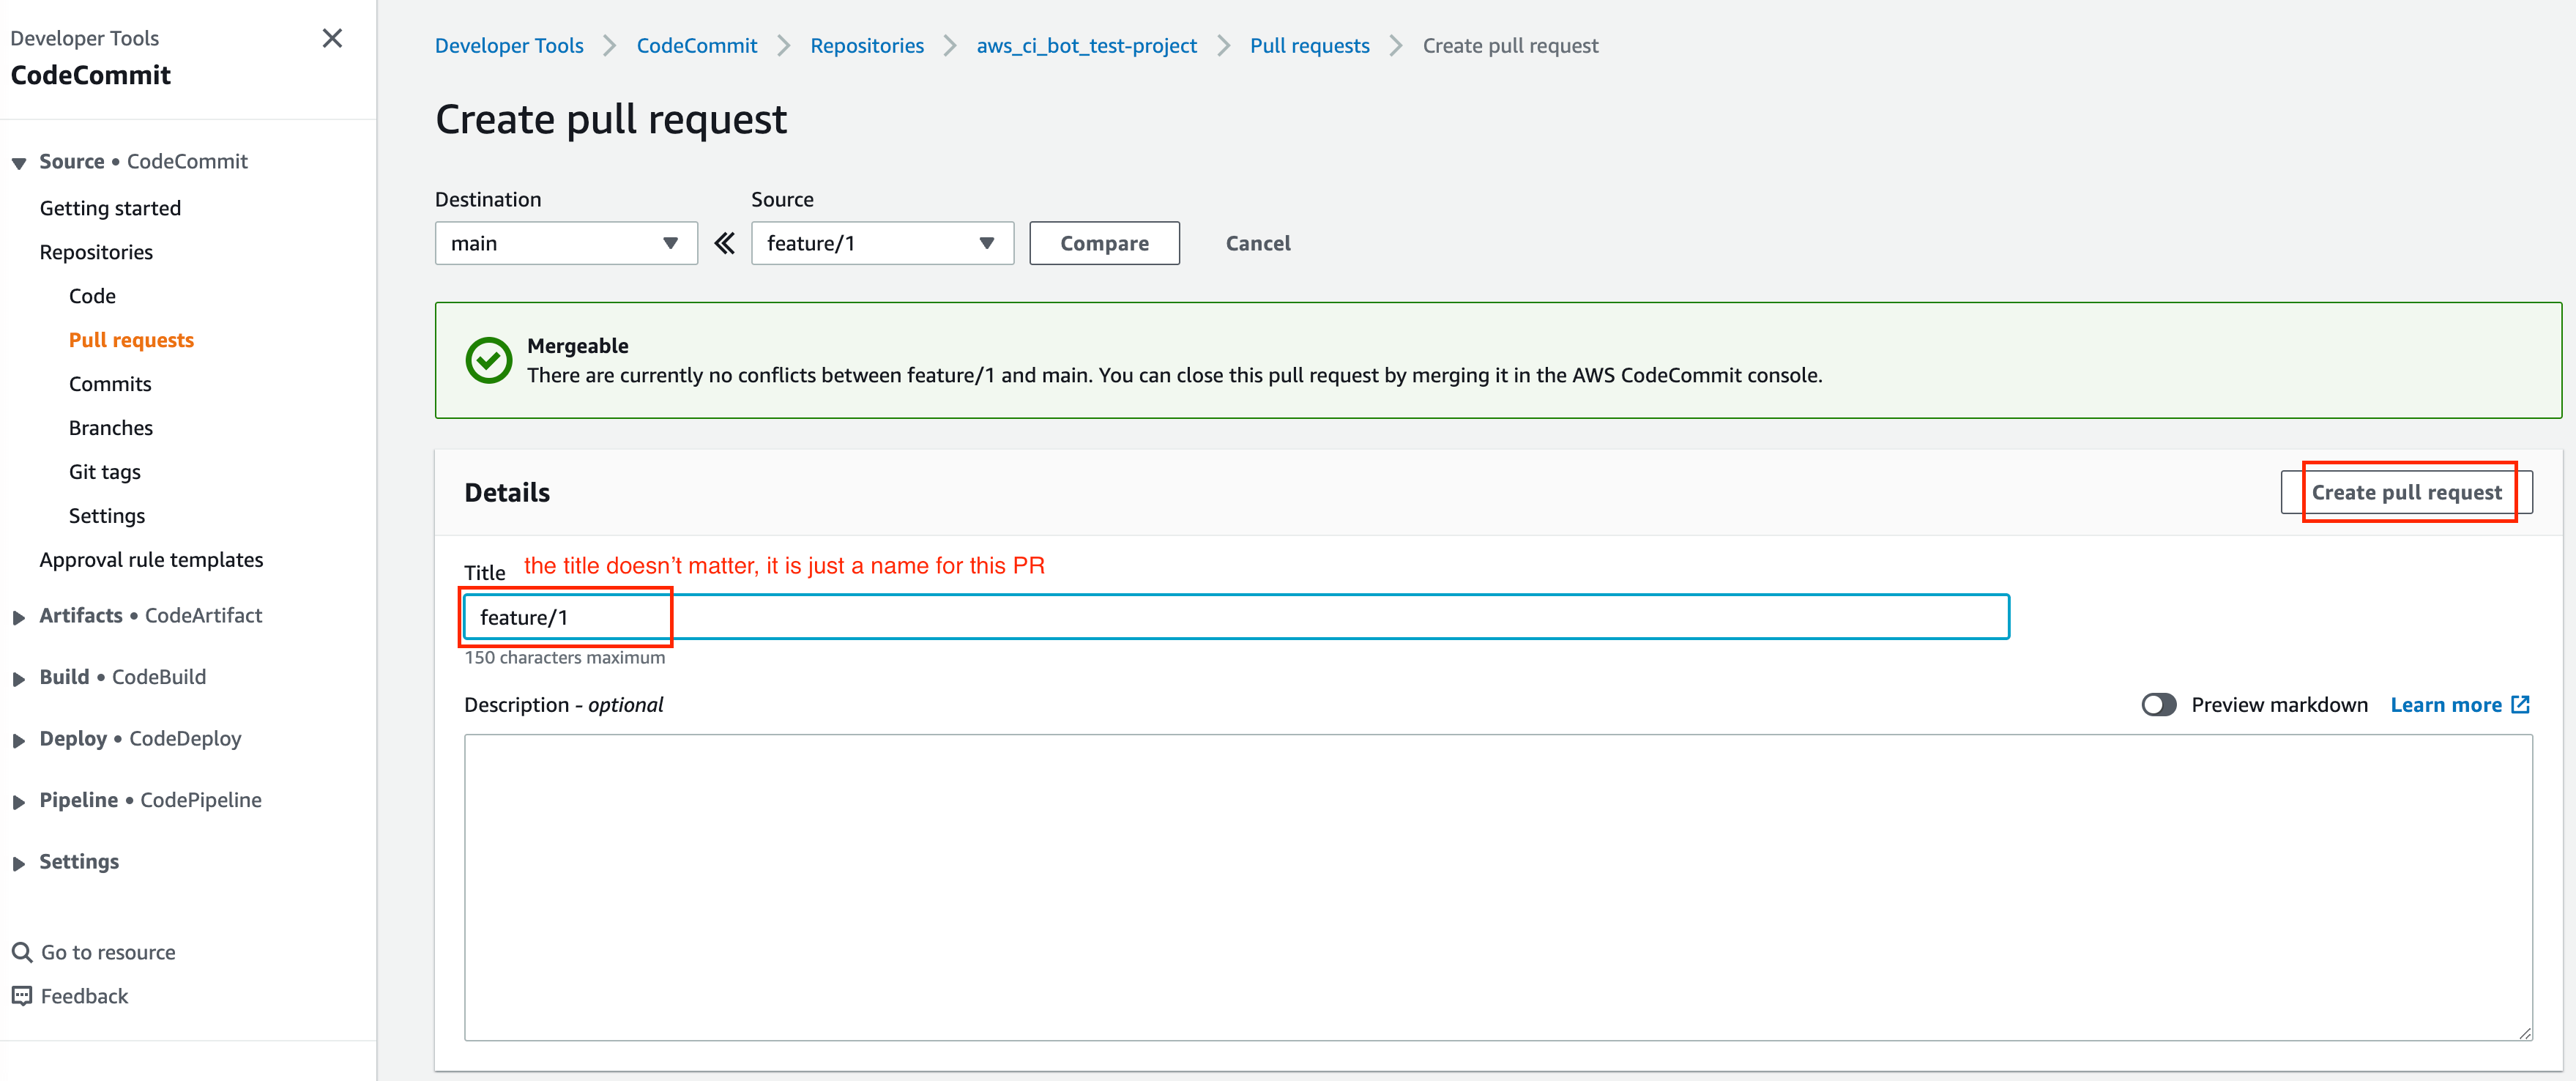
Click “Create pull request” button, choose to merge from
feature/1tomain, give it a random title and click the “Create pull request” button.
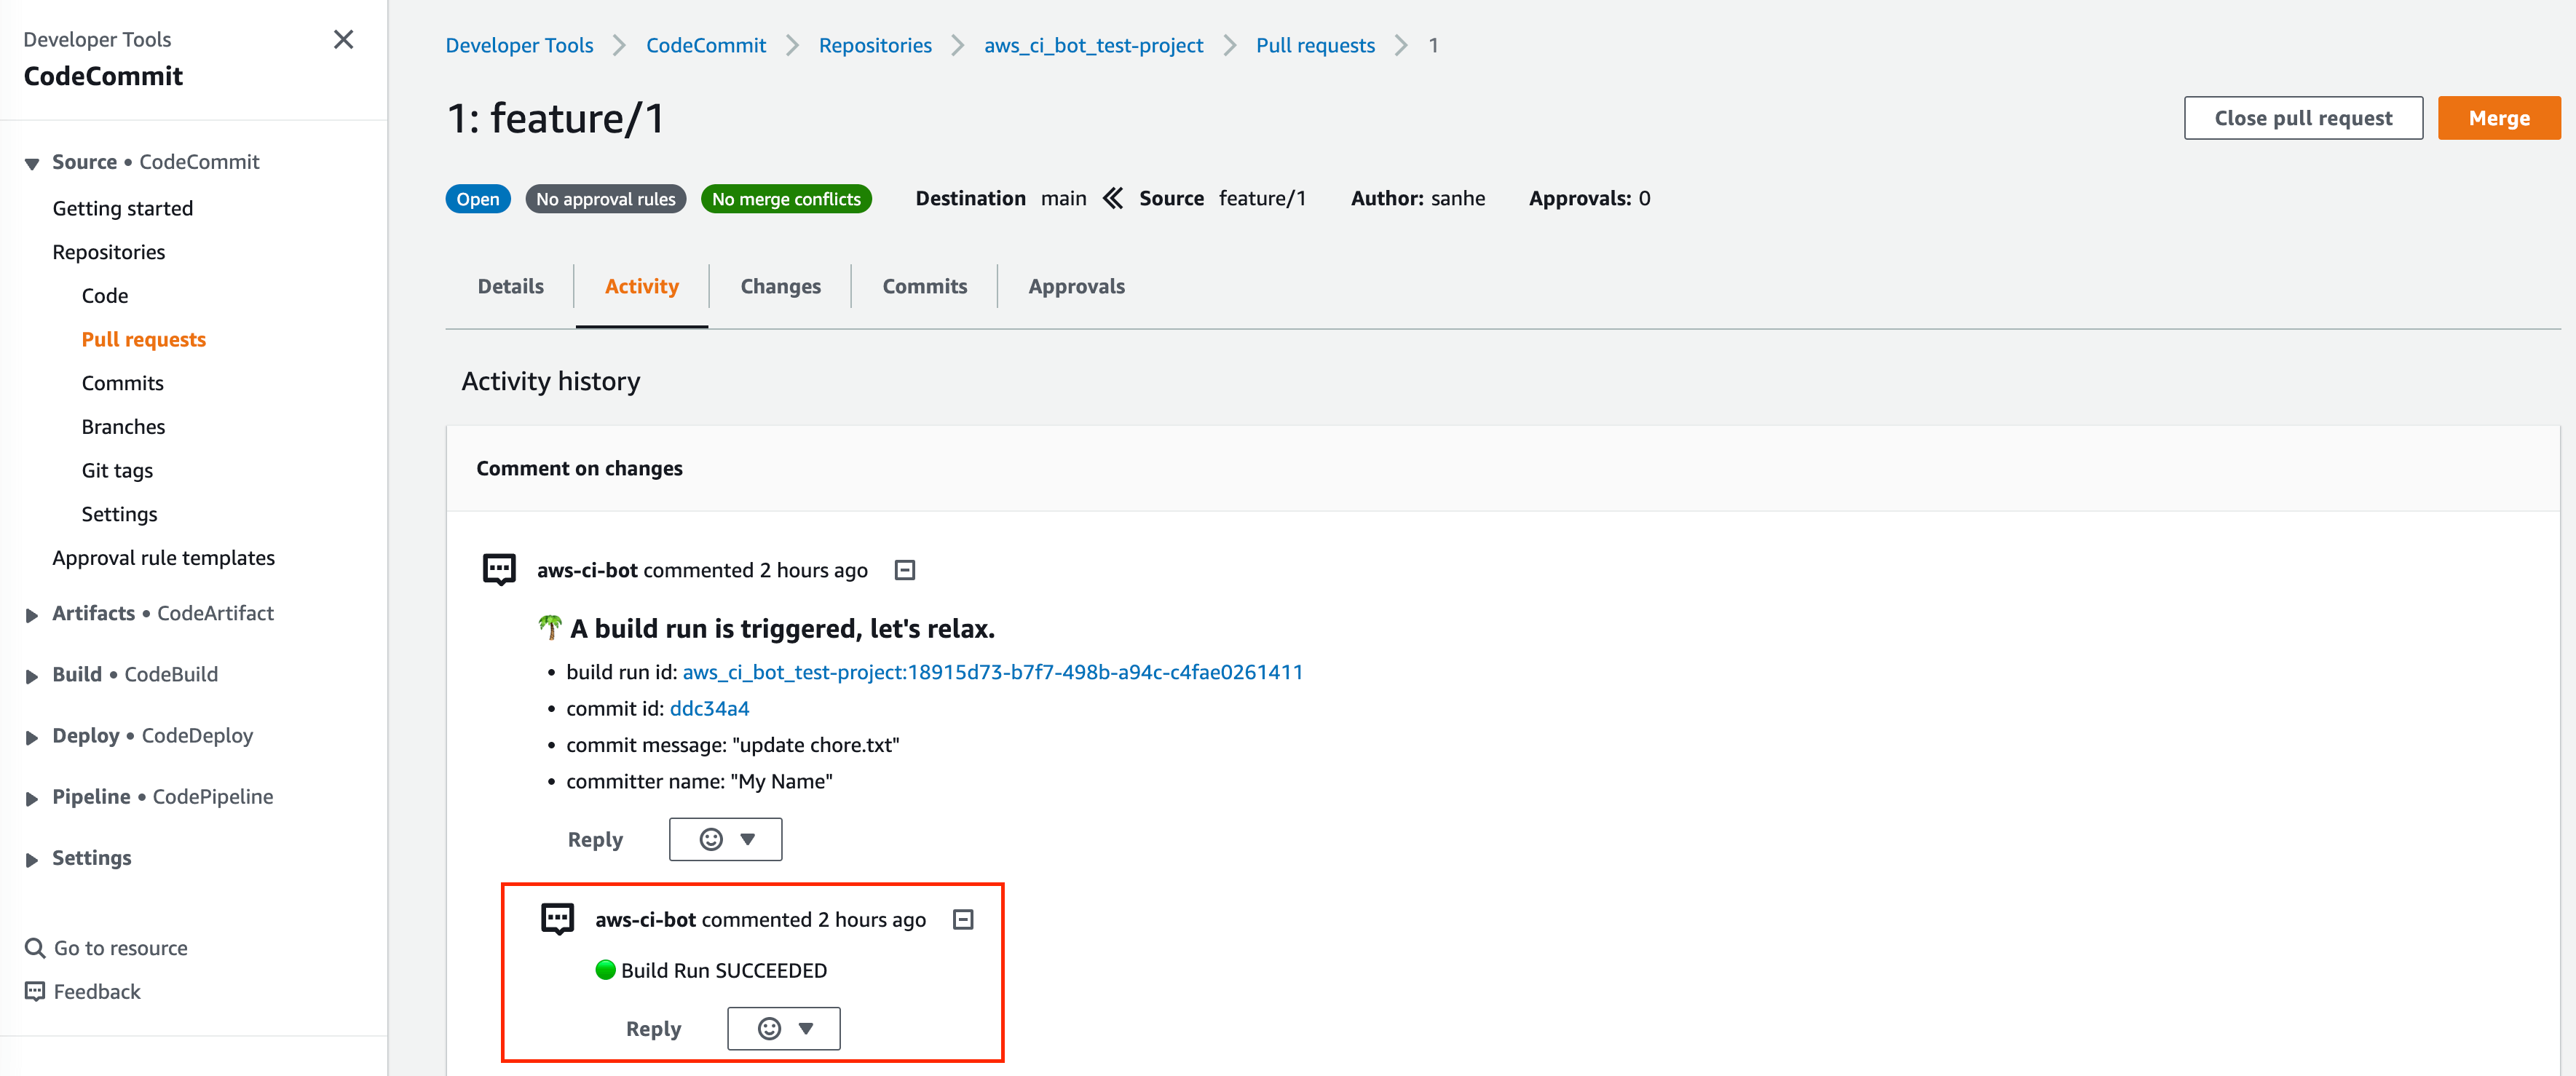
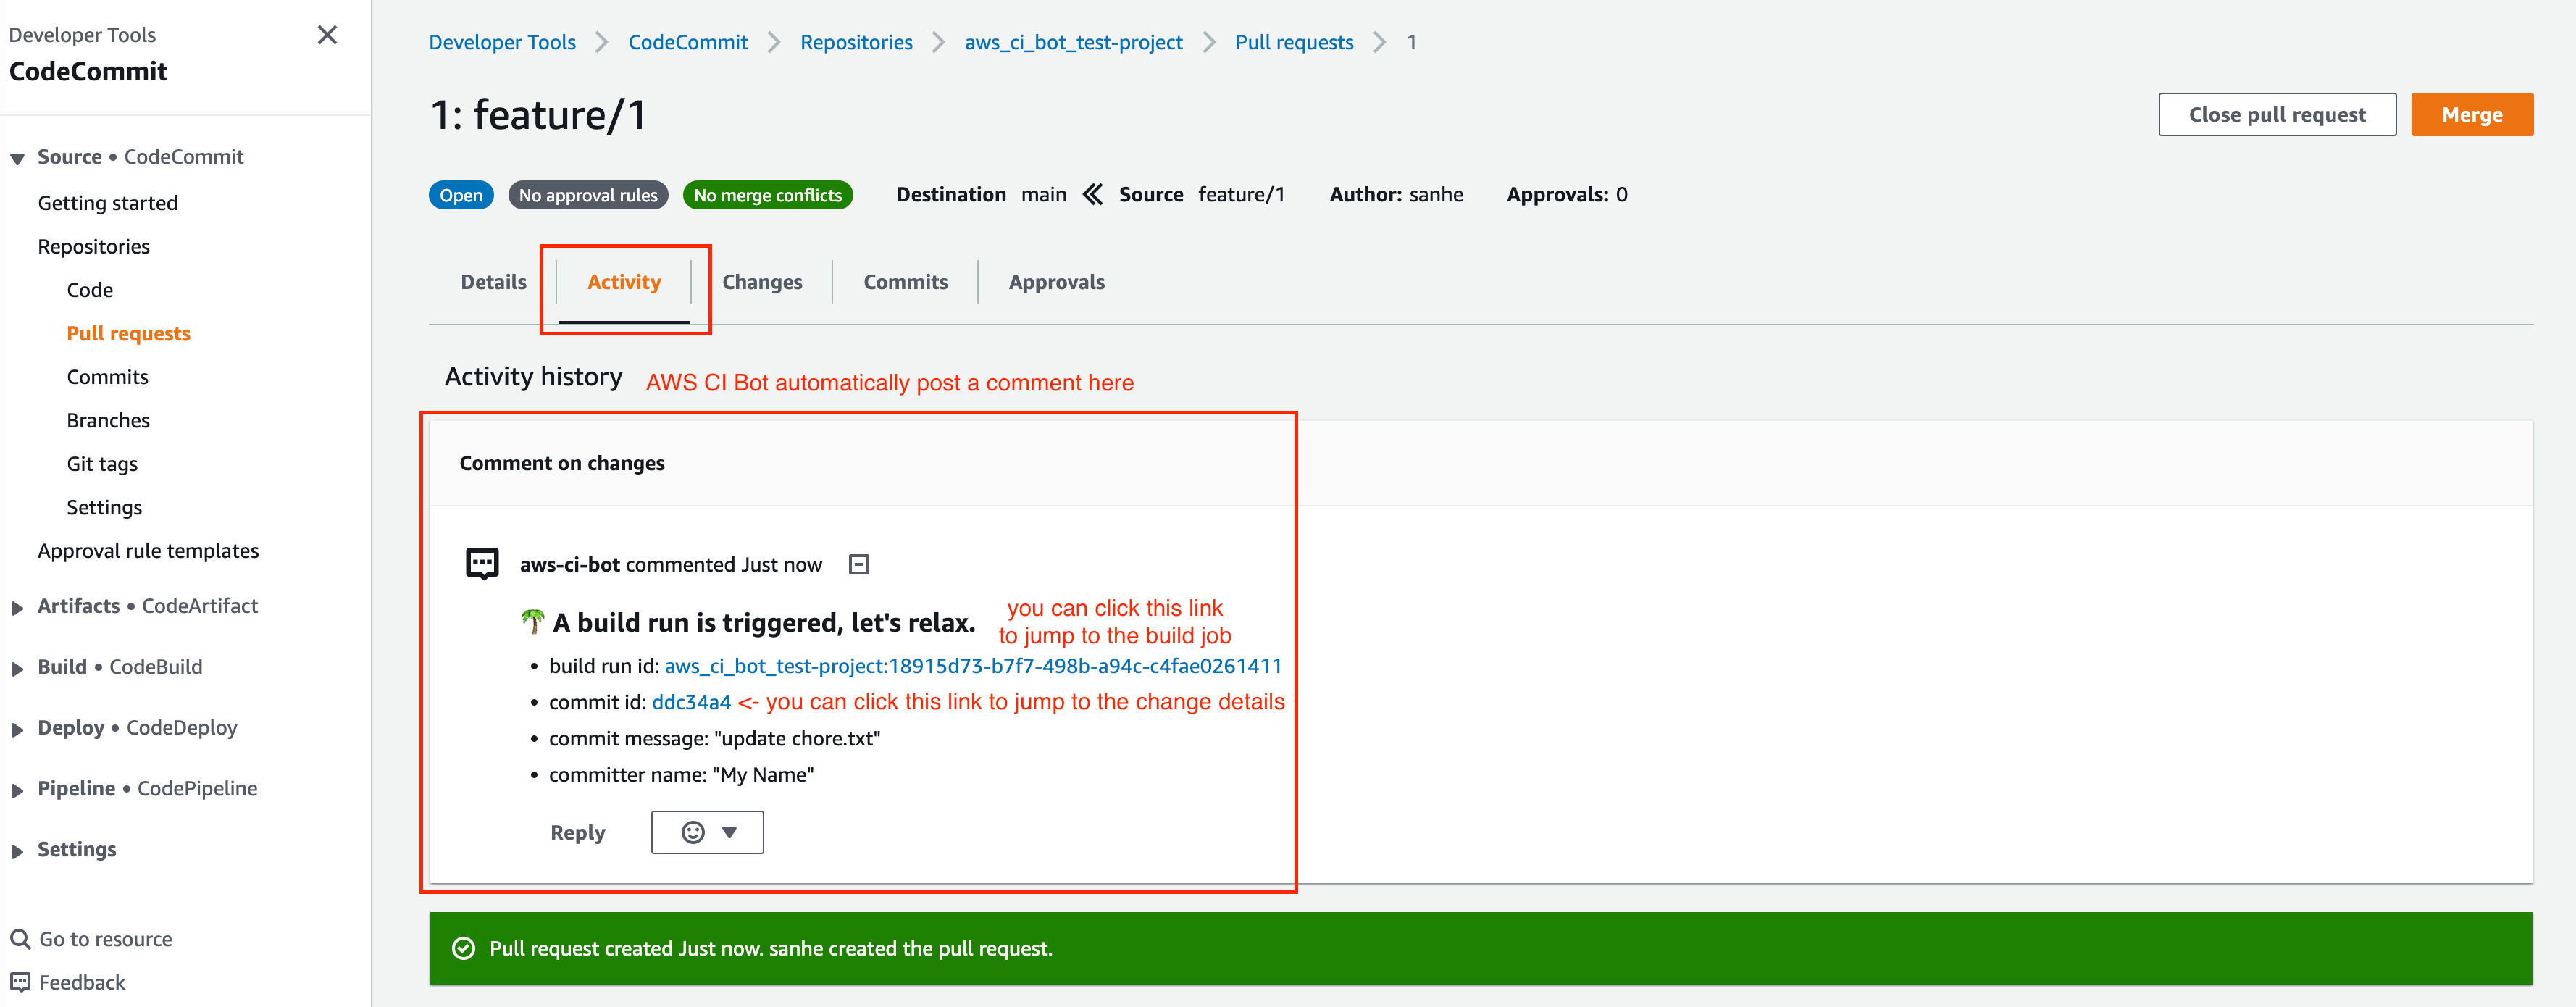
Switch to the “Activity” tab, you will see the CI bot just triggered a CodeBuild job run and automatically posted a comment to the PR. You can click on the link to jump to the CodeBuild job run, or to the detailed changes for the commit. After a while, when the job run Success or Failed, the CI bot will automatically reply to the comment and tell your the result.
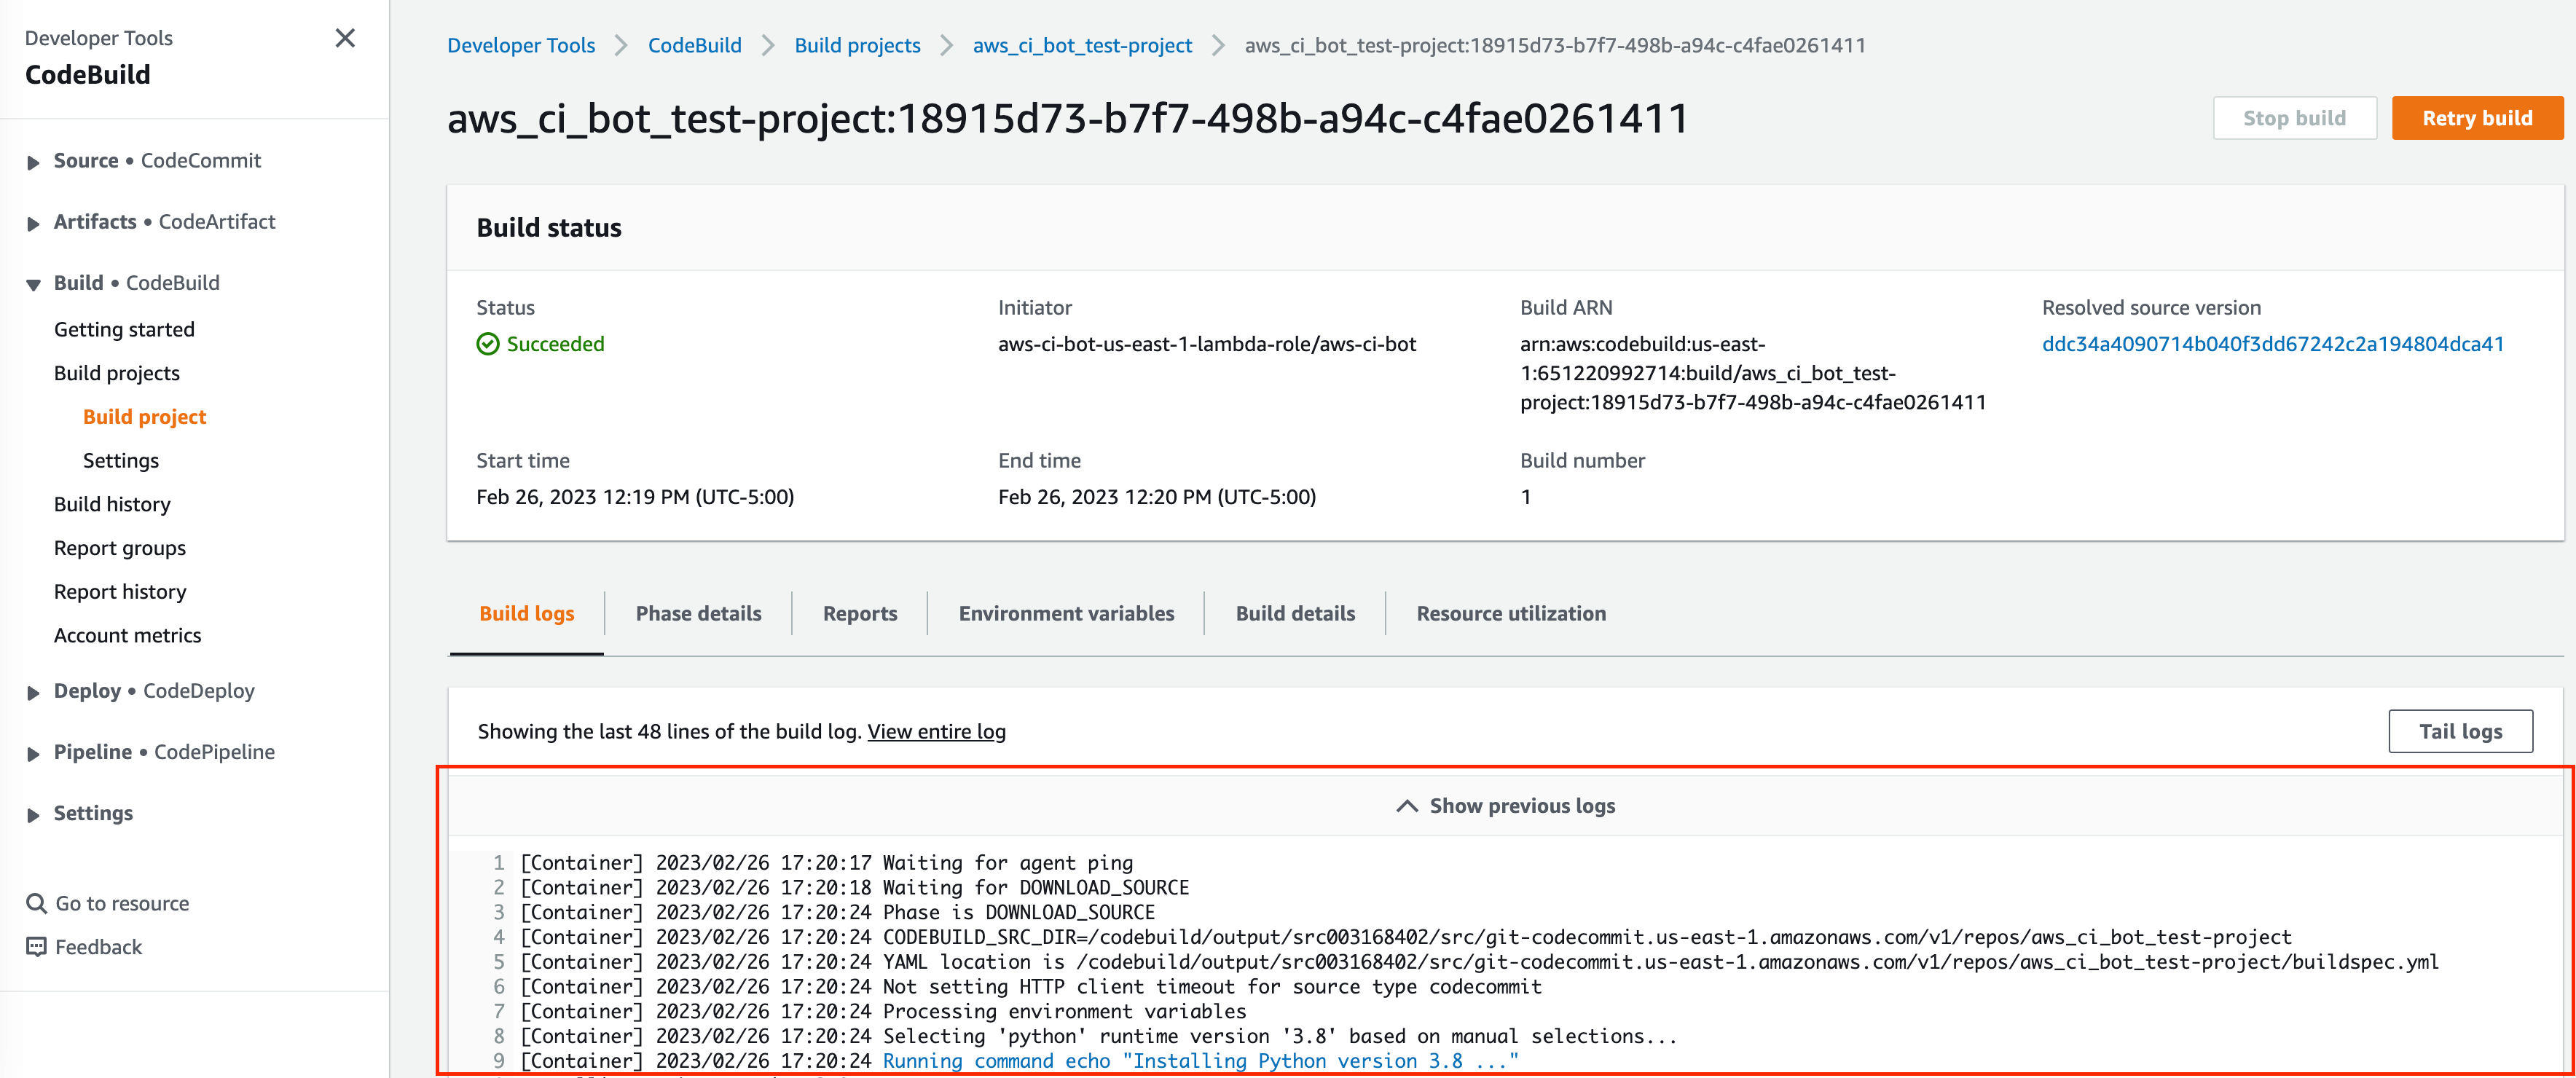
While the CI is building, you can see there is a new build job show up in the CodeBuild job run console.
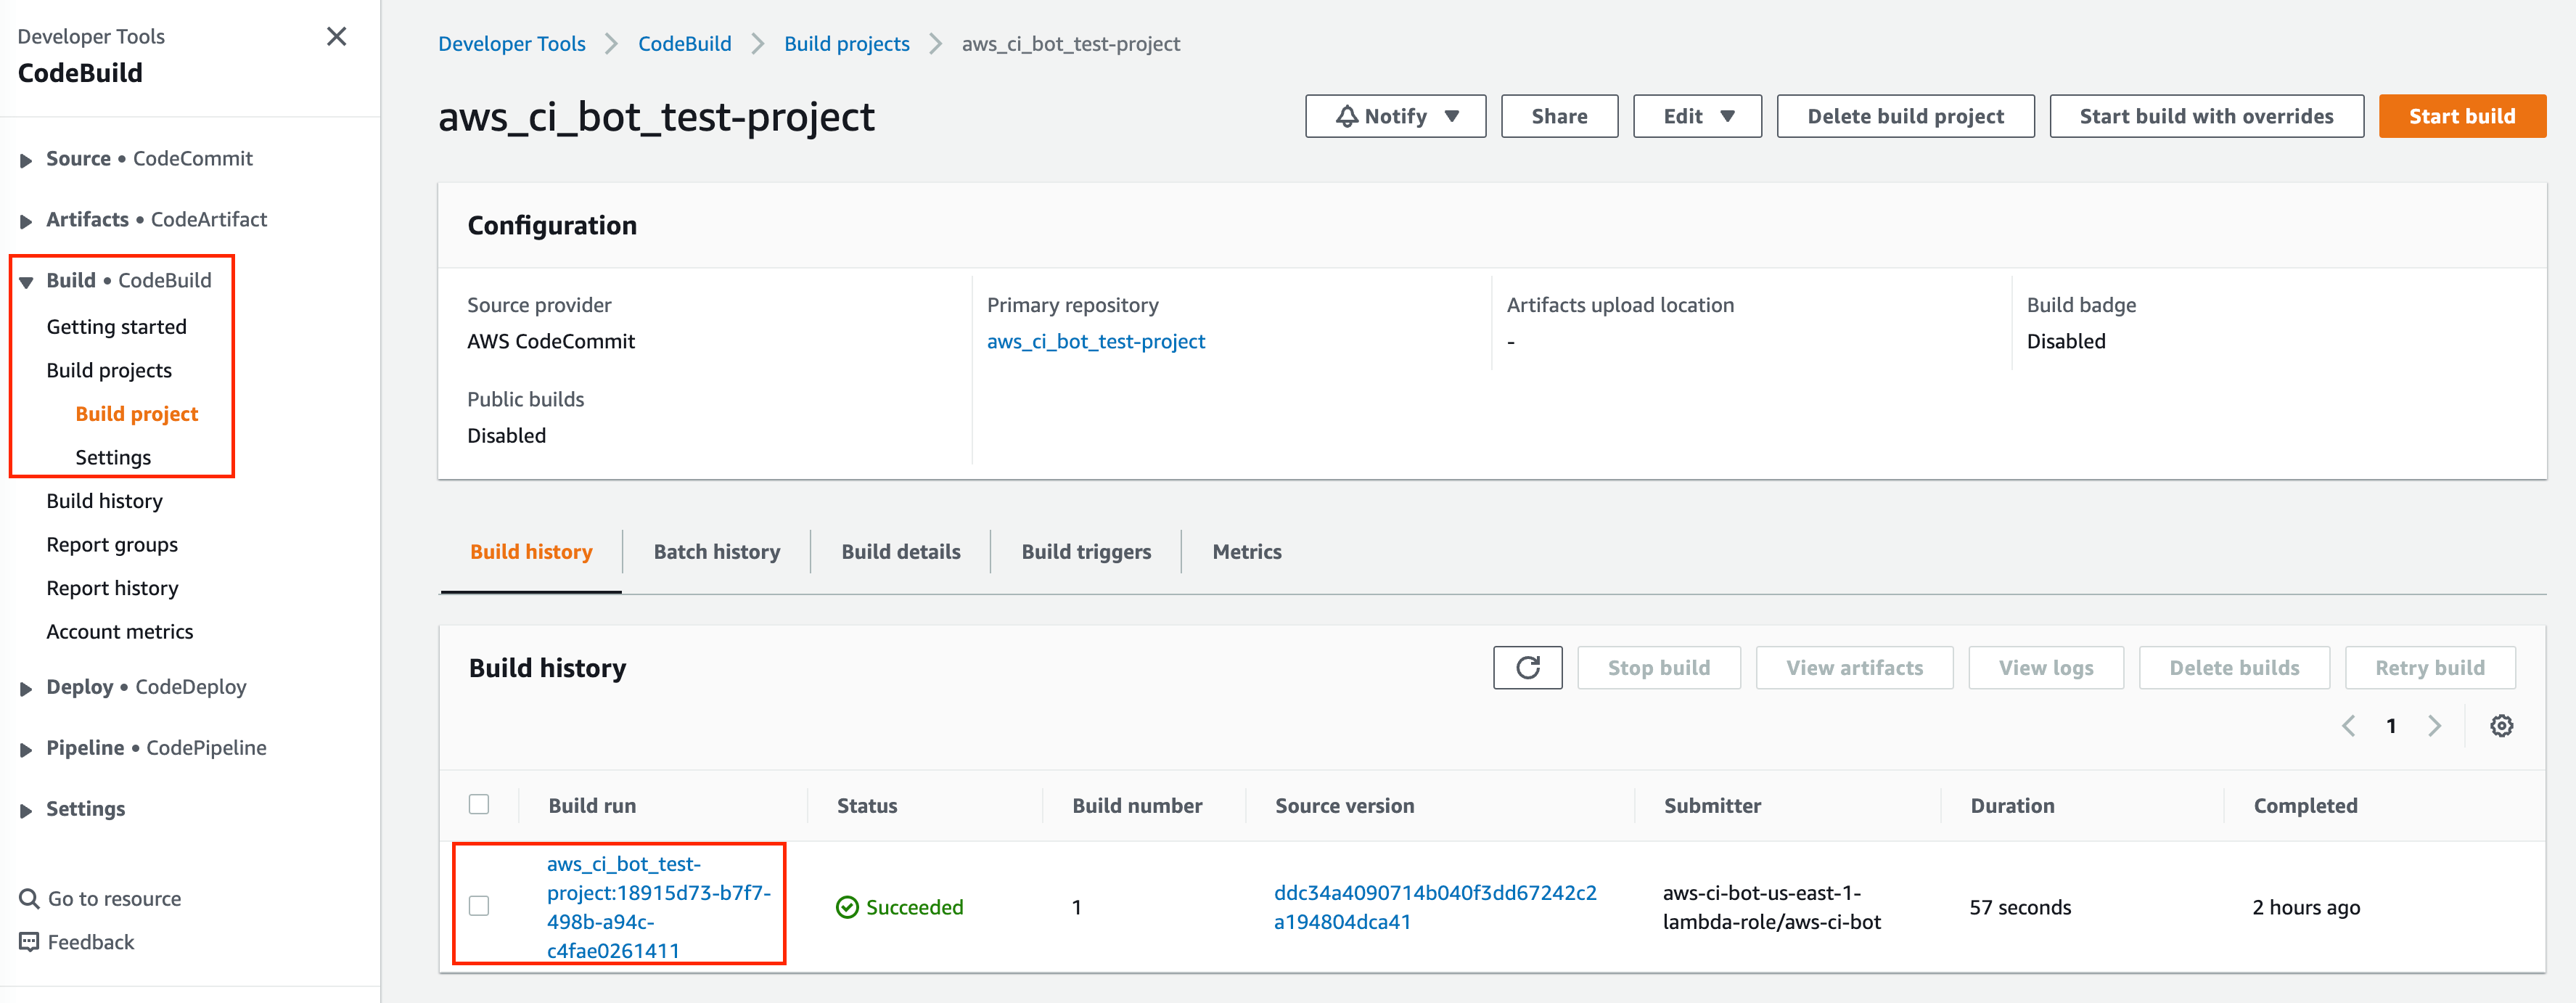
You can see the detailed log of the build job in the “Build logs” tab.
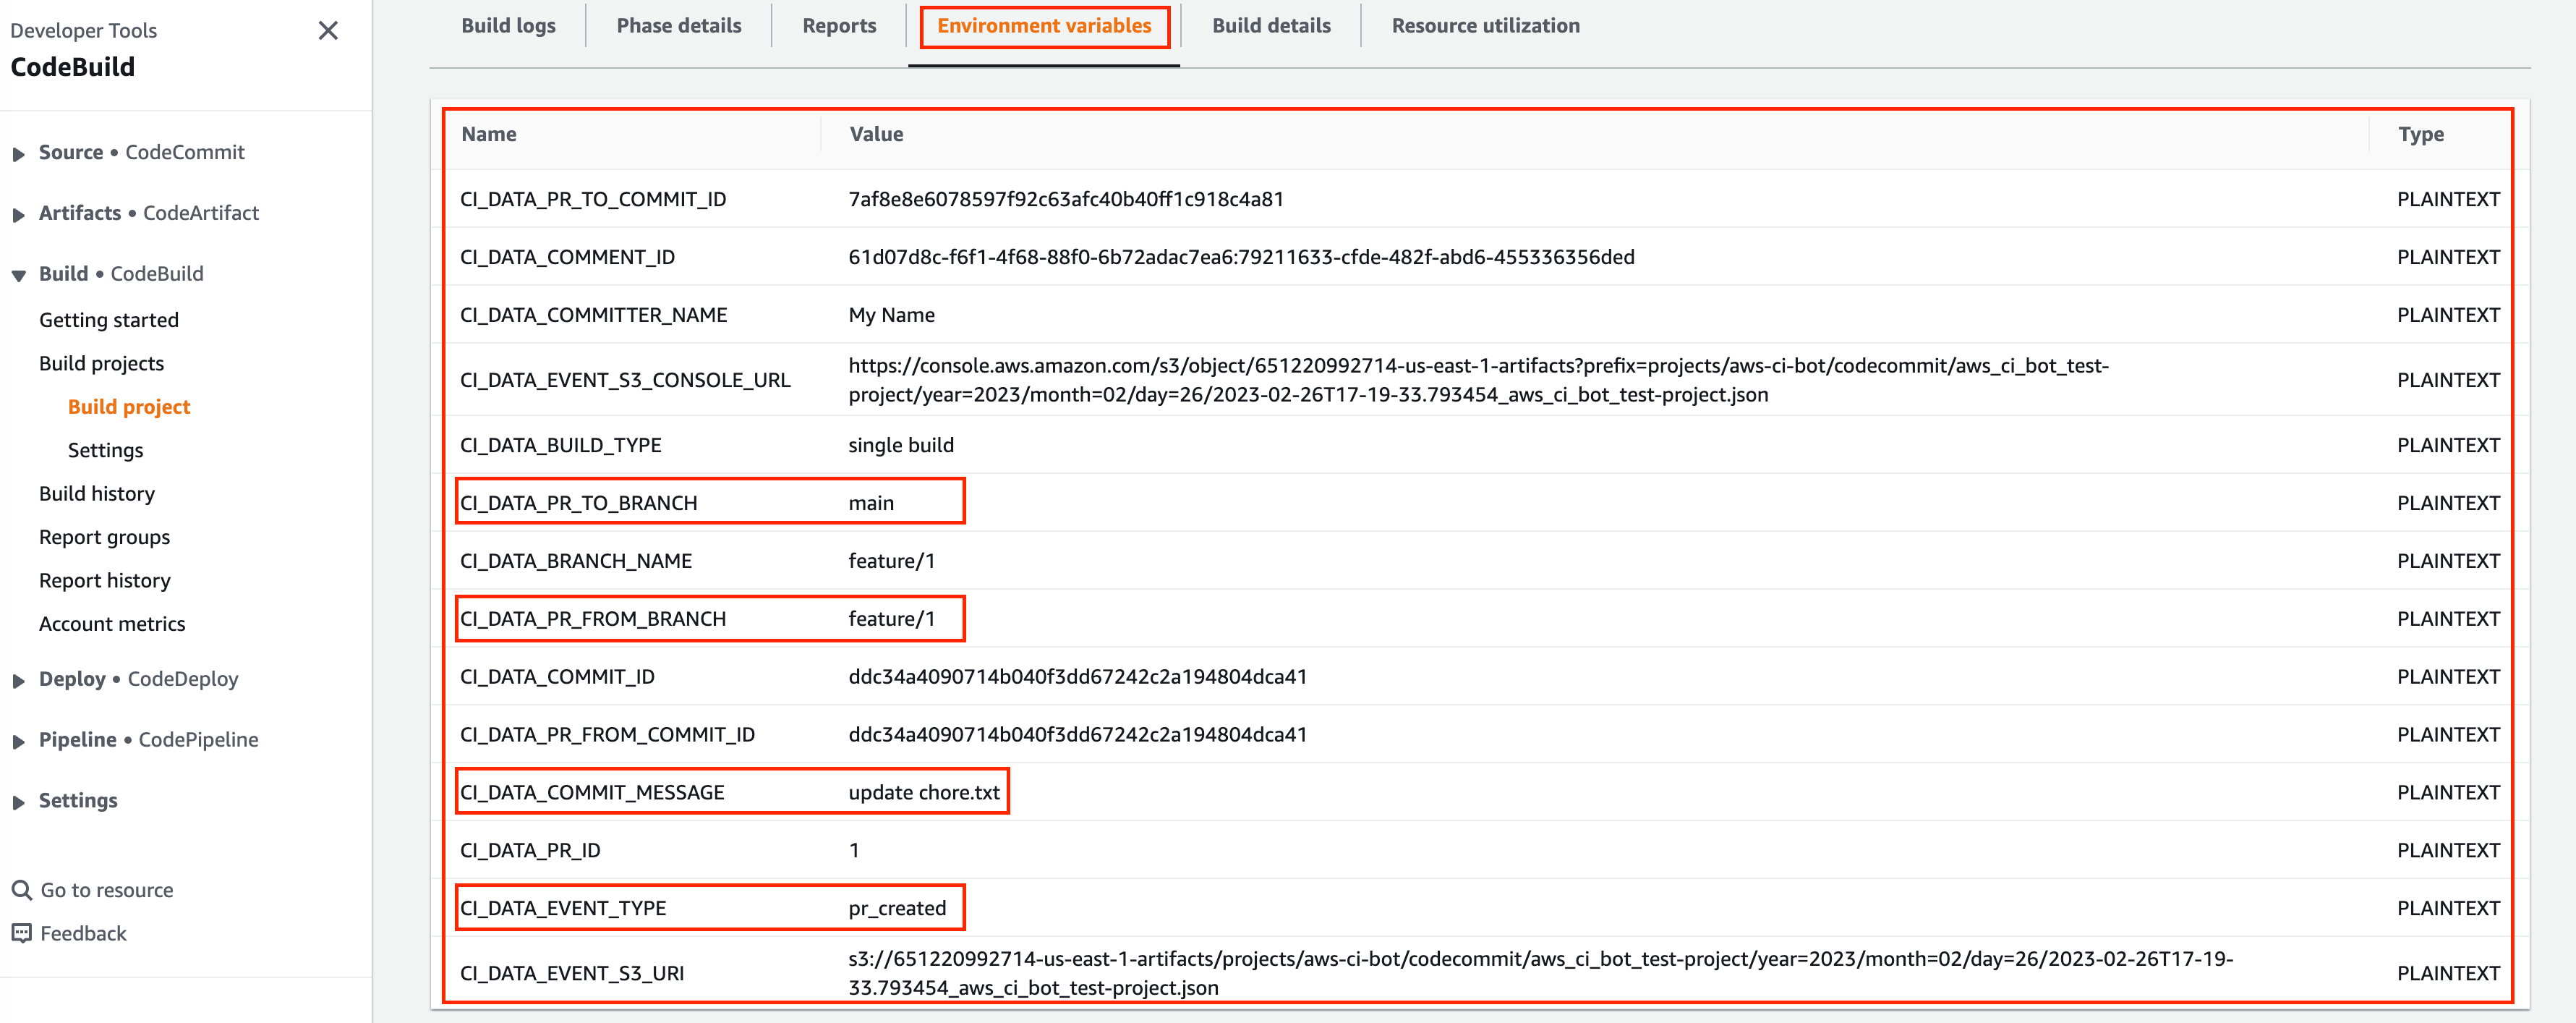
Also,
aws_ci_botsolution automatically generates lots of helpful environment variables to provide more details about the build job. You can utilize these environment variables in your CI/CD automation scripts.
After the build job is finished, you can see the result in the “Build details” tab.